نوشته شده توسط : Likaibin

Model:
Mercedes Benz SL500 (R129) 2001

Problem:
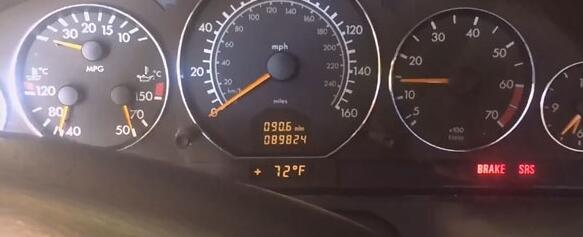
Made a key for a 2001 SL500, car ran fine for 2 days.. Then car won’t start..
Solution:

hht-win-benz-sl500-1

hht-win-benz-sl500-2

hht-win-benz-sl500-3

hht-win-benz-sl500-4
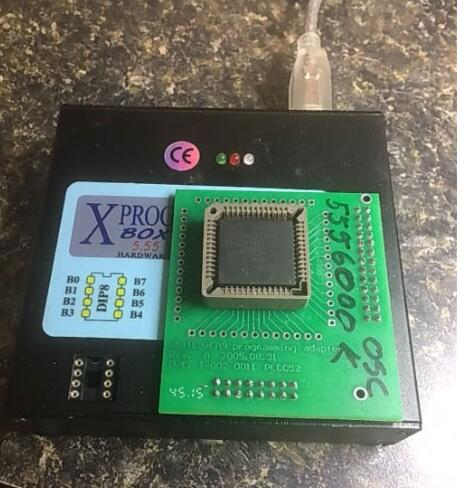
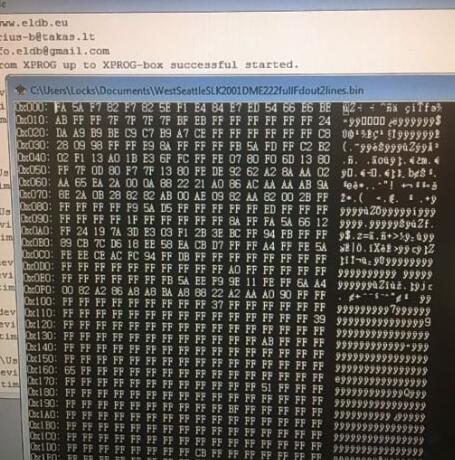
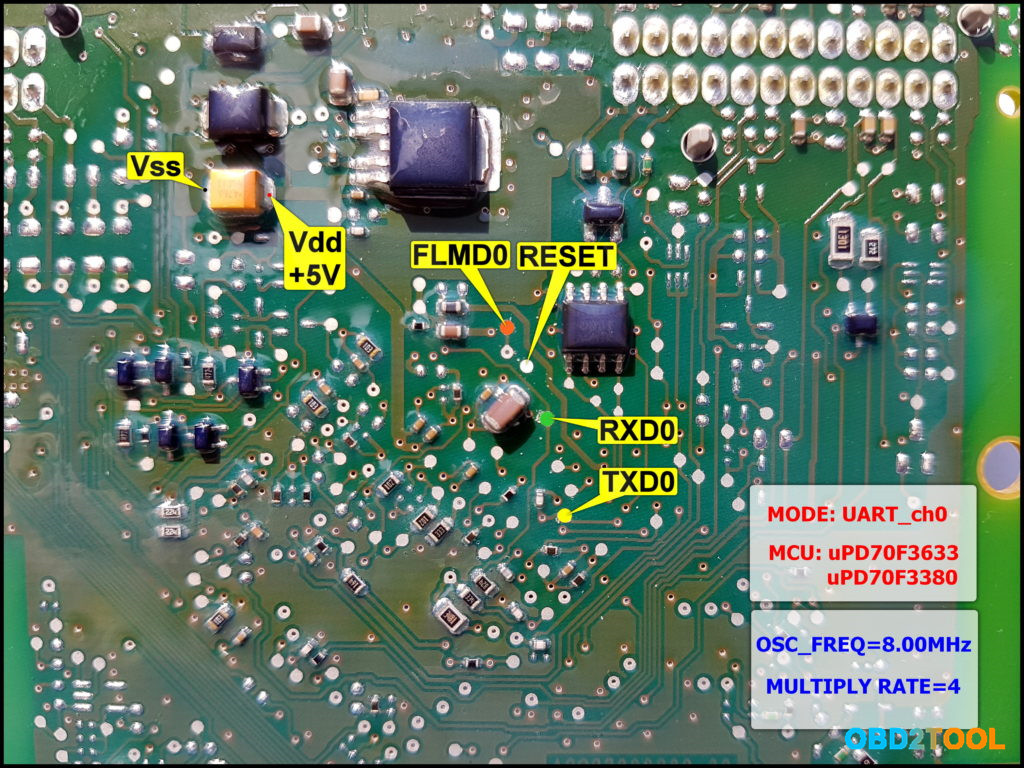
Took immo box out and read HC05 chip with xprog 5.84, data was garbled..
Tried writing data to two new/used immo boxes.. those were bad too..

hht-win-benz-sl500-5
hht-win-benz-sl500-6

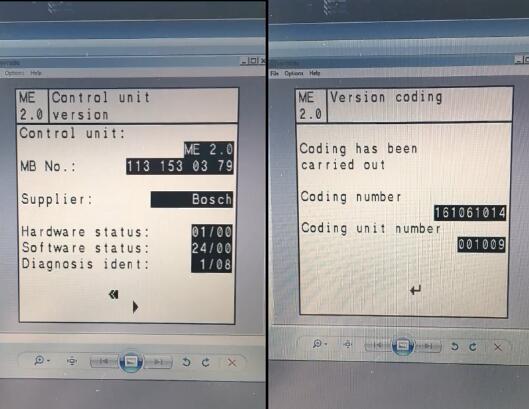
Put Julie emulator on DME, a Bosch ME2.0, first try, the car started but no gas pedal, wrote data again and personalized DME, and it worked fine…

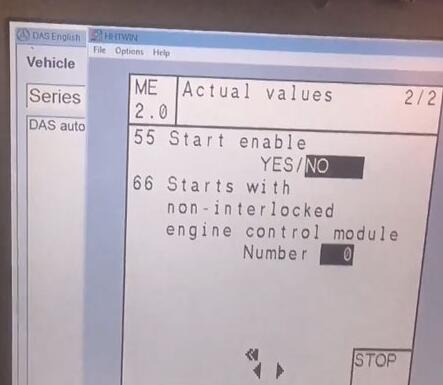
When checking DAS authorizations under actual values, make sure to hit the right arrow button, it shows the last authorization…

Procedure to personalize/code DME:

Device used:

MB Star diagnostic scanner SD Connect C4/C5 with software HHT-WIN (latest mb star software has HHT functionality)

hht-win-benz-sl500-7
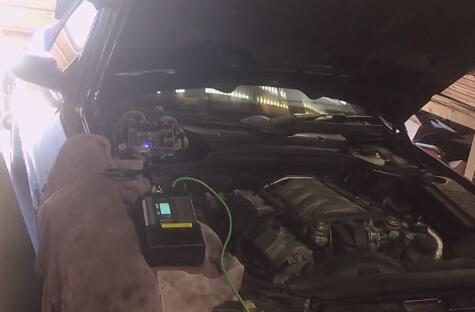
Connect C5 Xentry Connect multiplexer via WLAN cable and setup software on my a Dell laptop
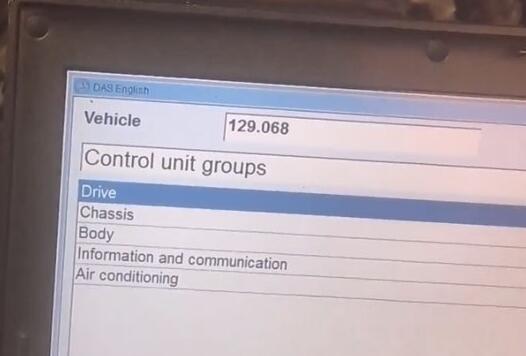
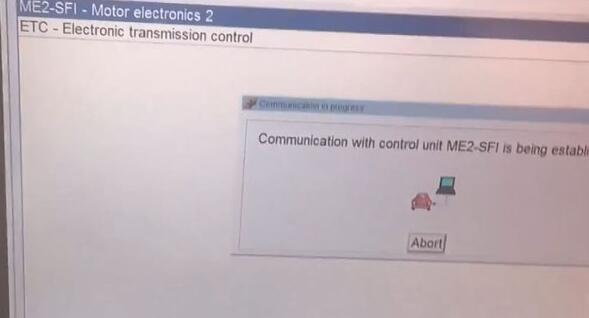
Select vehicle model, Control Unit Groups->Drive->ME2-SFI-Motor electronics 2

hht-win-benz-sl500-8
hht-win-benz-sl500-9

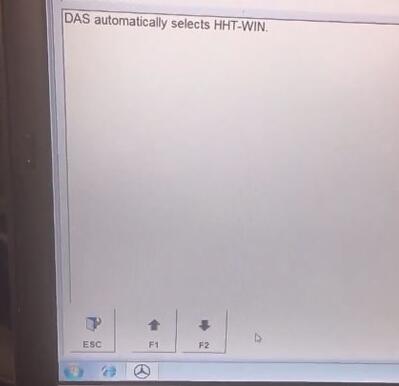
DAS will automatically selects HHT-WIN

hht-win-benz-sl500-10

Diagnostic multiplexer is being initialized
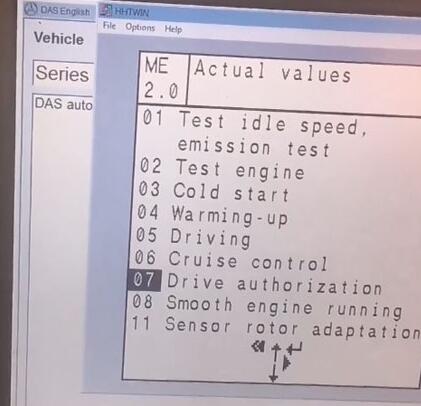
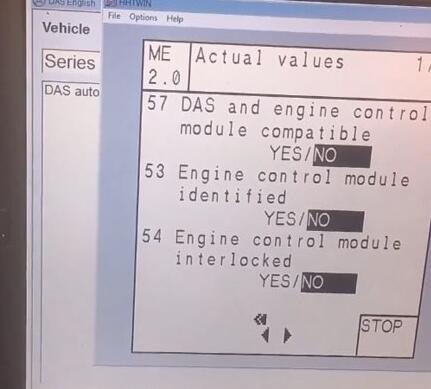
Select Actual values->Drive authorization

hht-win-benz-sl500-11
hht-win-benz-sl500-12

You can see engine control module  is not compatible nor identified
Engine cannot start either

hht-win-benz-sl500-13
hht-win-benz-sl500-14

Start coding

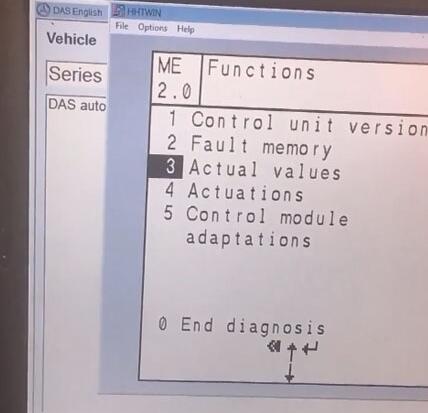
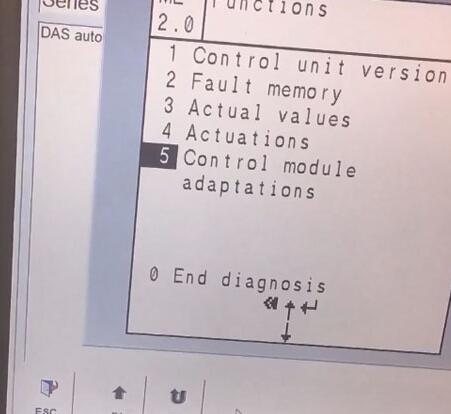
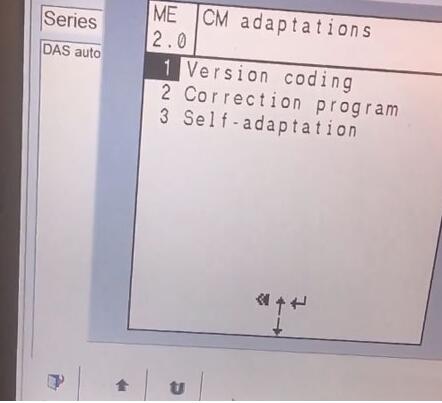
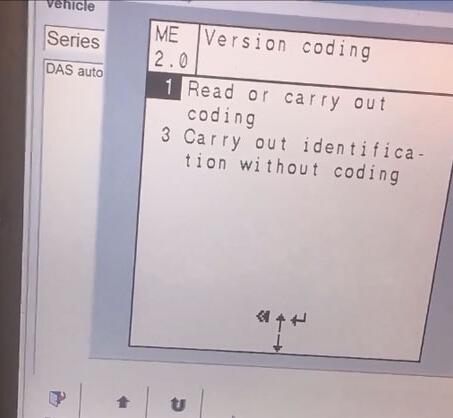
Select Control unit adaptations->Version coding->Read or carry out coding

hht-win-benz-sl500-15
hht-win-benz-sl500-16
hht-win-benz-sl500-17

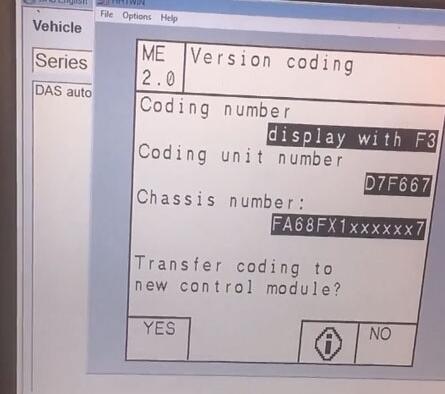
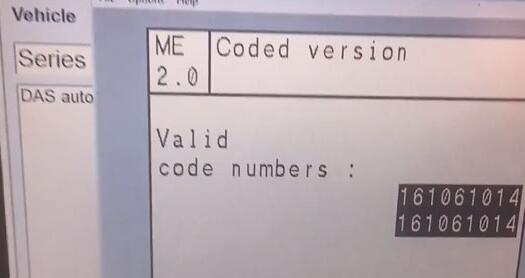
HHT-WIN displays coding number, coding unit number and chassis,and valid code numbers

hht-win-benz-sl500-18
hht-win-benz-sl500-19

Press YES to Transfer coding to new control module

Turn off ignition

hht-win-benz-sl500-20

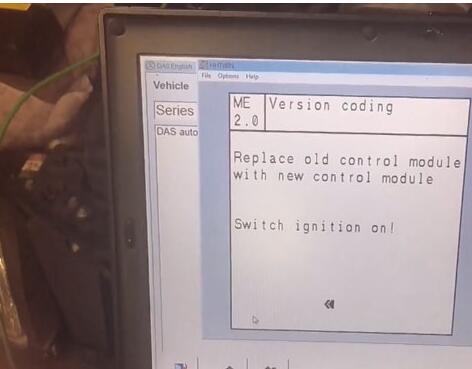
Replace old control module with new control module
Turn on ignition

Coding has been carried out

hht-win-benz-sl500-22
hht-win-benz-sl500-23
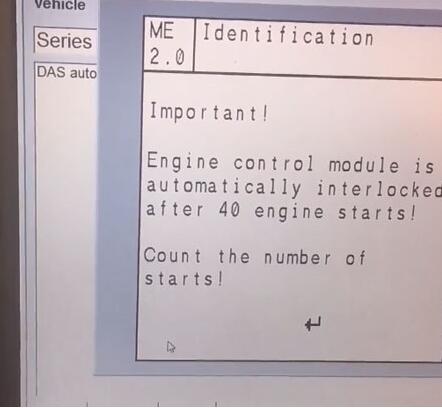
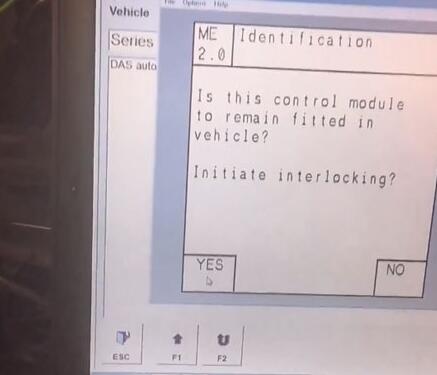
Identification is being carried out.
Engine control module is automatically inerlocked after 40 engine starts

hht-win-benz-sl500-24
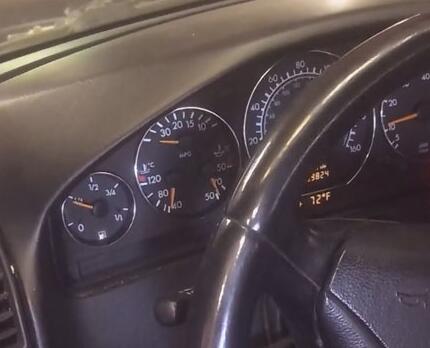
Engine starts
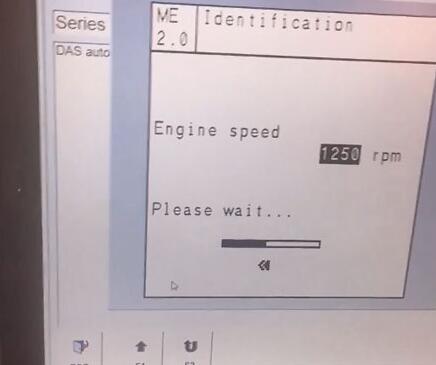
engine speed raise from o to 1250 rpm or so and the green indicators on MB SD C5 unit flash

hht-win-benz-sl500-25

Initiate interlocking

hht-win-benz-sl500-26
hht-win-benz-sl500-27

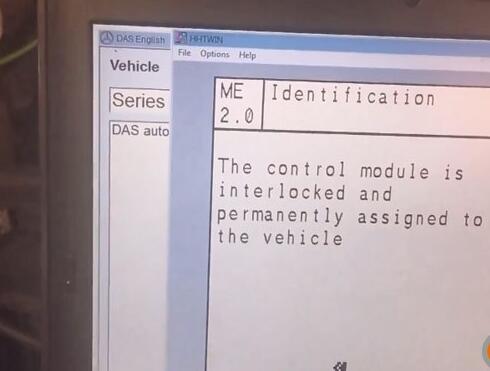
The control module is interlocked and permanently assigned to the vehicle
Switch off ignition
Turn on ignition
Now go back to check actual values

hht-win-benz-sl500-28
hht-win-benz-sl500-29
hht-win-benz-sl500-30

Engine module is identified/interlocked and engine is able to start.

Done.


:: بازدید از این مطلب : 109
|
امتیاز مطلب : 0
|
تعداد امتیازدهندگان : 0
|
مجموع امتیاز : 0
تاریخ انتشار : سه شنبه 9 مهر 1398 | نظرات ()
نوشته شده توسط : Likaibin

This article show a guide on how to use Launch X431 to program mileage for Europe Ford Focus after instrument cluster replacement. This function is only necessary on newly installed instrument clusters.


The attention of the two points :

A,It is not possible to overwrite a value lower than the mileage.

B,If the odometer write failed, you can try again.


Procedures:

Diagnose:Select”Calling system”menu.


Wait for 1 minutes. Then the Vehicles Specification screen displays.


Select”ICM”menu


Enter Odometer Write functions in the “SPECIAL FUNCTION” menu


When selecting “Odometer Write”, it will display as below show.


It can only enter a value higher than actual mileage.(Now Mileage:34531Miles)


If you enter a value lower than actual mileage,it show as below


Press ok to reenter


when you enter a correct data, it will show as below


Press ok to Complete.


Done!


:: برچسب‌ها: launch x431 ,
:: بازدید از این مطلب : 124
|
امتیاز مطلب : 0
|
تعداد امتیازدهندگان : 0
|
مجموع امتیاز : 0
تاریخ انتشار : شنبه 9 شهريور 1398 | نظرات ()
نوشته شده توسط : Likaibin

If your Lonsdor K518ISE complete, then you press ok it needs update again. You need to follow the below solution to renew the firmware, the solution is tested ok by Lonsdor Engineers, so just take easy to follow.


Step 1. Lonsdor K518ISE firmware update package free download link:

https://mega.nz/#!ZYIg1CbJ!HCAZJTPbtJ3VY3X51eJt42a_673-MT8xQq61Qvl17K8

Step 2. How to renew the Lonsdor K518ISE firmware?

1.Download and unzip the attached file, you will get

A

2.Setup “PhoenixSuit_CN.msi”, open the app “PhoenixSuit”.

B

3.Connect your K518ISE to a computer with a USB cable.

① Click the button in red first.

② Click the button in black next.

C

③ Find the file

D

and click it (marked in red, step 1).

④ Then click the button marked in black (step 2).

E

4.Hold on the power key and you will see interface below. Click the button marked in red. And immediately hold on the volume+ key until you see a progress bar in the computer.

F

5.Two windows will pop up, just click YES.

6.Update firmware successfully. Pull out the USB cable and wait them device to automatically restore.

7.Don’t touch the device. You will see a white screen and there are two buttons (set up WIFI and update).

8.Set up WIFI and then update. The problem will be solved after updating.


:: برچسب‌ها: Lonsdor K518S ,
:: بازدید از این مطلب : 134
|
امتیاز مطلب : 0
|
تعداد امتیازدهندگان : 0
|
مجموع امتیاز : 0
تاریخ انتشار : سه شنبه 29 مرداد 1398 | نظرات ()
نوشته شده توسط : Likaibin

图片1

We have two version software V4.0 and V4.2 for John Deere Service Advisor EDL V2:

1.V4.0 software: Support Languages: English

2.V4.2 software:Support Languages: English, French, Italian, Spanish, Portuguese


Notice: If you want to do 3038E truck, then need to use V4.2 software (Hardisk Version).


With John Deere PLD File Encryptor/Decryptor you can:

-Decrypt PayLoad (PLD) file to txt/ini format

-Modify PLD file expiration

-Modify PLD factory options such as speed limit (for example change 40 km/h to 50 km/h)

-Adjust PLD file to different product serial

-Encrypt PLD file

-Program controller with modified PLD using Service Advisor

-Support Windows XP


How to change speed limit with pld files?

Q1:

Question about payload files:

I have pld files of my tractor (6330P) 11 in total.

I see in bottom of each files info about my tractor (option, serial number etc)

Question: My goal is up the speed limit from 40km to 50 km. I think I have to change OPTION=3 to OPTION=5, but do I have to edit each 11 pld file? 

A1:

You were right about the speed limit:

you can change OPTION=3 to OPTION=4 or any other you need.

Speed_30kmh = 1;

Speed_35kmh = 2;

Speed_40kmh = 3;

Speed_50kmh = 4;

Speed_ECO = 5;

Speed_NoiseRed_OOS = 6;


For R models the line is different. ROADSPEEDLIMIT=3 change to ROADSPEEDLIMIT=5 or any other you need.


var RoadSpeedLimit_30 = “1”;

var RoadSpeedLimit_35 = “2”;

var RoadSpeedLimit_3840 = “3”;

var RoadSpeedLimit_40E = “4”;

var RoadSpeedLimit_50 = “5”;

var RoadSpeedLimit_50E = “6”;

var RoadSpeedLimit_55 = “7”;

var RoadSpeedLimit_60 = “8”;

var RoadSpeedLimit_60E = “9”;


After you change it, sometimes you still need to lift the speed manually through the display (depending on the tractor model)


You only need to reprogram transmission controller for that.

If you reprogrammed all of them, some settings might have went to default so you might get up to 5 fault codes that you need to configure with SA.


Q2:

Does it work with SA 4.2?

A2:

Service Advisor is just a tool to use pld. Pld editor works without SA.


Q3:

I have a question about trying to up the power of a 6330 to a 6430. If I compare the engine pld of both tractor they are identical (just the info in the bottom is different) So I don’t know how it could up the power if all the code is the same??

A3:

most pld files are made for various models, the info at the bottom determines which part of the pld file will be used for programming. For example:

PRODUCT_MODEL_NO=6115

PERFORMANCE_OPTION_PART_NO=R546973

FACTORY_OPTIONS=RE570443


If you want to know model list,please check the link:

https://www.obd2tool.com/goods-5219-JOHN-DEERE-DIAGNOSTIC-KIT-software-in-hard-disk.html


If you want us install the software in the laptop ready for use,you can check this one:

https://www.obd2tool.com/goods-10212-John-Deere-Service-Advisor-EDL-V2-Plus-lenovo-T410-laptop.html


:: برچسب‌ها: John Deere Service Advisor ,
:: بازدید از این مطلب : 122
|
امتیاز مطلب : 0
|
تعداد امتیازدهندگان : 0
|
مجموع امتیاز : 0
تاریخ انتشار : جمعه 11 مرداد 1398 | نظرات ()
نوشته شده توسط : Likaibin

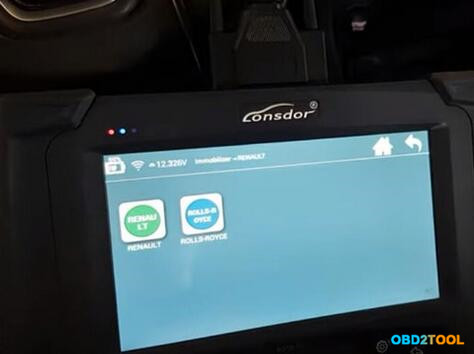
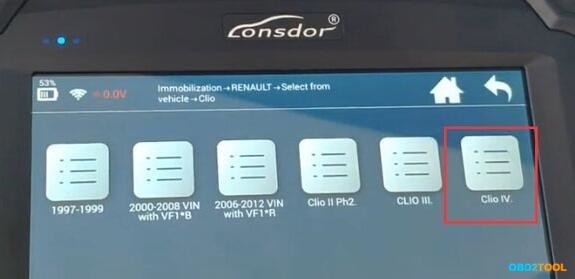
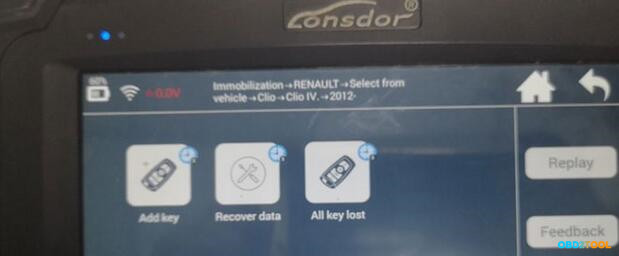
Renault Clio 4 all keys lost key card programming is verified can be done by Lonsdor K518ISE/K518S key programmer under subscribed menu.

Read pin code – ok
Immobilizer programming- ok
Remote programming-ok

Note:

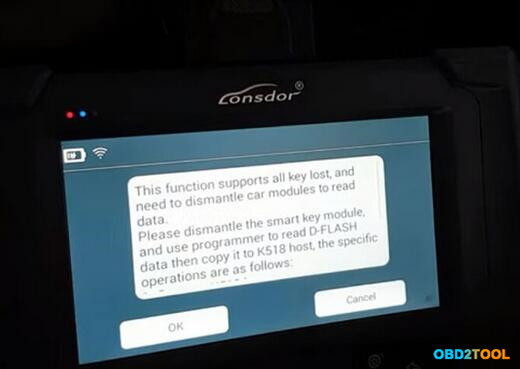
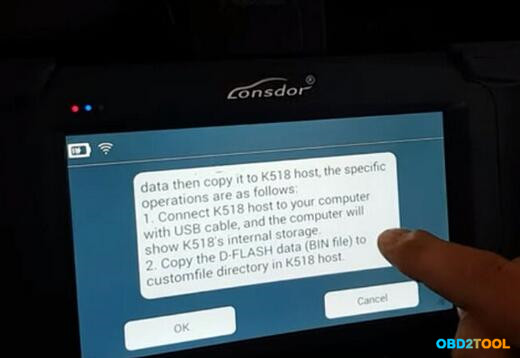
Require to dismantle the smart key module HFM to read D-FLASH D70F3633 data by programmer (VVDI Prog, Orange5 etc) then copy bin file to K518 “customfile” folder.

lonsdor-k518-renault-clio-iv-0
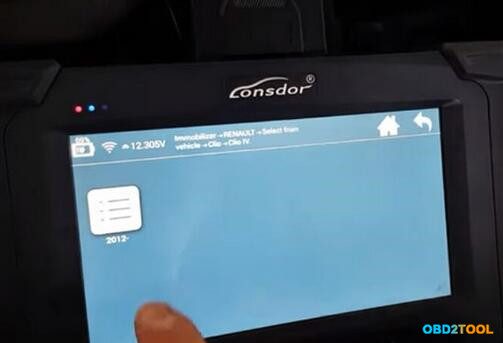
In K518, select Renault->Select from vehicle->Clio->Clio IV->2012 up->All key lost

lonsdor-k518-renault-clio-iv-1

lonsdor-k518-renault-clio-iv-2
lonsdor-k518-renault-clio-iv-3

lonsdor-k518-renault-clio-iv-4

Follow Lonsdor prompts to read HFM data and paste bin file to K518 customfile folder.

lonsdor-k518-renault-clio-iv-5

lonsdor-k518-renault-clio-iv-6

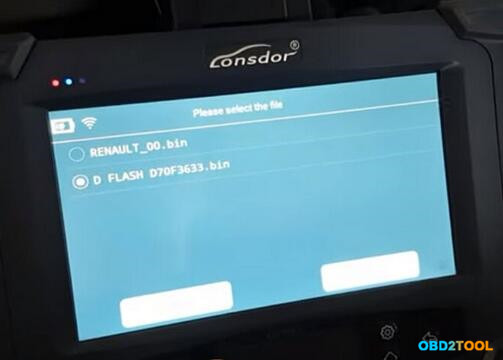
Select D-Flash D70F3633 bin file

lonsdor-k518-renault-clio-iv-7

Reading file data

lonsdor-k518-renault-clio-iv-8

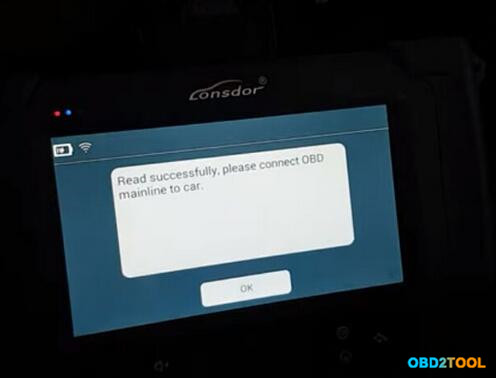
Read data successfully

lonsdor-k518-renault-clio-iv-9

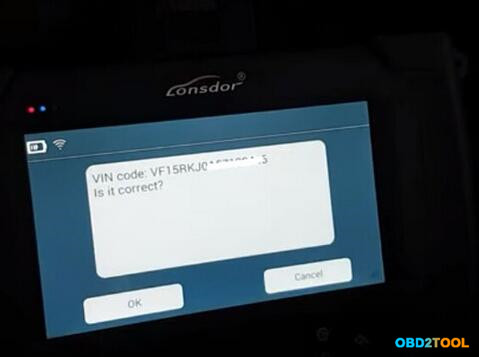
Read VIN and confirm

lonsdor-k518-renault-clio-iv-10

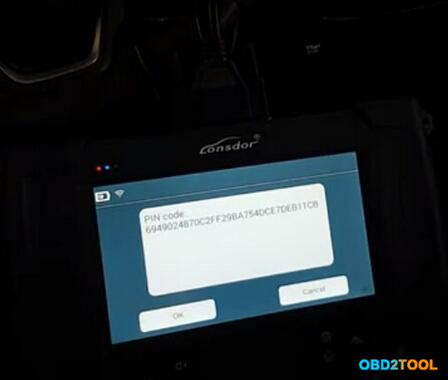
Lonsdor K518 Read Pin Code success

lonsdor-k518-renault-clio-iv-11

lonsdor-k518-renault-clio-iv-12

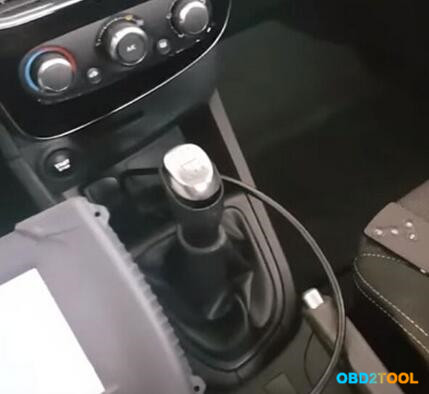
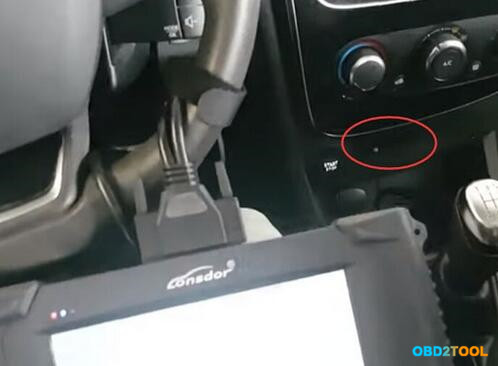
Insert key card into slot and turn on ignition

lonsdor-k518-renault-clio-iv-13

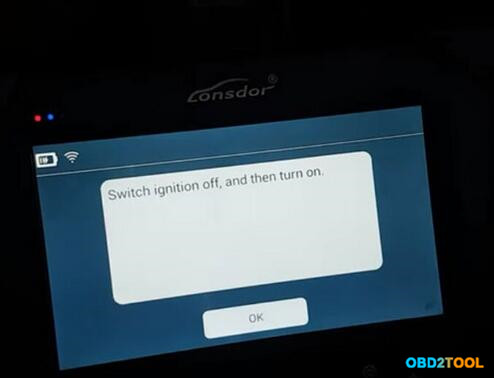
Switch ignition off and then turn on again

lonsdor-k518-renault-clio-iv-14

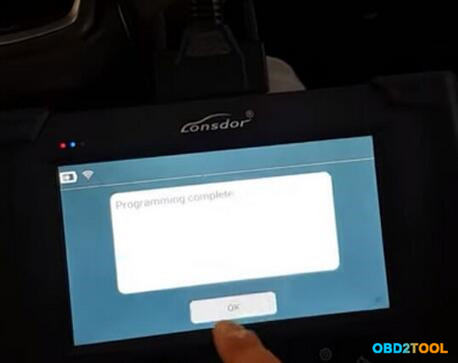
Program completed.  Continue to program next key card or quit
lonsdor-k518-renault-clio-iv-15
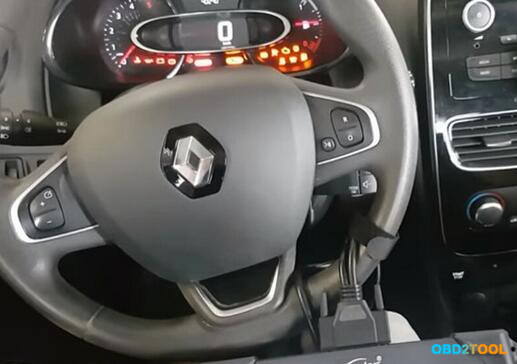
Test the new key, start engine

lonsdor-k518-renault-clio-iv-16

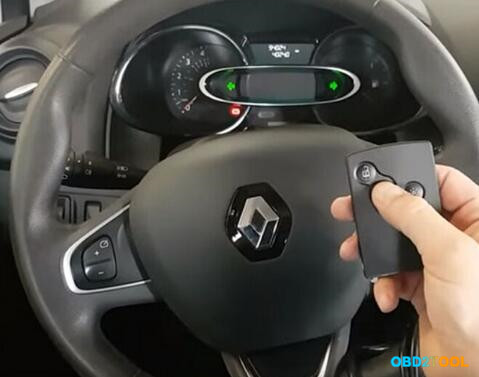
Test the remote control.

Done.


:: برچسب‌ها: Lonsdor K518 key programmer,Lonsdor K518, ,
:: بازدید از این مطلب : 152
|
امتیاز مطلب : 0
|
تعداد امتیازدهندگان : 0
|
مجموع امتیاز : 0
تاریخ انتشار : چهار شنبه 2 مرداد 1398 | نظرات ()
نوشته شده توسط : Likaibin

Here is all about a real user feedback on SD Connect Compact 4 full kit from obd2tool.com, which was put on the OBD2TOOL and now was quoted here for reference for all potential users as consideration.

Topic: Is it worth buying a SD C4 + Xentry for the W205 yet?

*** User background information ***

I’ve been doing a lot of reading recently about the MB diagnostics software and I’m getting more and more interested in purchasing a full kit out of China with everything set up and ready to go – i.e. MB SD Connect Compact 4 Star Diagnostic tool + the 2015.09 dev version software (Xentry etc.) + a Dell D630 Laptop.

I’m hesitant, mainly because the car (W205) is so new. There’s no real need yet to do any self-service work or complex diagnostics, but I’ve always liked having a reasonably good knowledge of the cars I’ve owned. The software suite seems very comprehensive and would no doubt be a good way to learn more about the car and understand the systems, coding configurations etc.

*** Optional vendors in consideration ***

Here’s just one example, but there are heaps out there – especially from China but some from Europe as well. EBay is also full of similar kits.

Most pricing seems similar so I’m not sure how different the quality is between various vendors.

*** User feedback on SD c4 full kit from mbstarshop ***

OK.. so Curious George (a.k.a me) couldn’t help himself and just before Christmas I ordered the full kit exactly as described in my earlier post.

Leading up to this, it was difficult to determine whether it would be valuable enough to buy, since finding reviews out there proved quite difficult. There are also a plethora of online vendors selling kits, hardware and software, which confuses the potential buyer even more so. Anyway, I thought I’d write up a quick review summary of my own experience in purchasing a full diagnostics kit – especially in reference to the W205.

What’s it like, what do you get, what can you do, etc… so here we go, my take on the full diag suite – get a big glass or wine (or beverage of choice) and settle in for what is hopefully and enjoyable and informative read.
sd-connect-c4-package-1
1. What is it?

This kit is a full Mercedes Benz diagnostics system. In a nutshell the components of a full kit comprise:

A suitable computer (in this case a Dell630)

An Star Diagnostics Connect (SDconnect) 4 multiplexer

Various interface cables

Mercedes Benz Star Diagnostic Software

Rather than clutter this intro, refer to the below sections for more detail on each component. Do you need everything listed above to get started? .. no, probably not. In principle you do need all those parts to perform full diagnostics but you can purchase bits from various vendors and you may even have some existing bits or are able to source software from other avenues (let’s not get into that ).

The one thing you do get quite nicely with a kit like this is, out of the box plug-in and go functionality. No mucking around loading software, stressing over setups, keys etc. You buy, you get, you use. Simple.

2. Where do I buy it?

Well.. duh, the internet of course – just making sure you don’t go into your local MB dealership asking for a kit .. you know .

Who do you buy it from? .. that I cannot fully answer, since I purchased my first kit and hence have no relevant comparisons to draw. Arguably the Chinese are the No.1 player in this market. They are the ones who clone the hardware and are certainly the prominent purveyors of such kits at a price point which suits the average punter.

One thing I do suggest is that you strike up a conversation with your potential vendor of choice before handing over your credit card. Unless you speak fluent Mandarin or Cantonese, it’s handy to know that your vendor will be able to understand your questions in relation to support/warranty or other things (and believe me, you will have questions!).

The second main point is to determine how reliable you feel the vendor is. I know it’s difficult to judge. Nobody knows who’s who on the internet. My guiding principles were to look at vendors who had an established track record in terms of their web presence and had reviews stretching back several years. Anyway, enough said on that – do your research and don’t just go looking for the cheapest price.

So once your order is placed, a very short time later you will receive a nice brown box like this:

Everything seemed nice and safely wrapped.

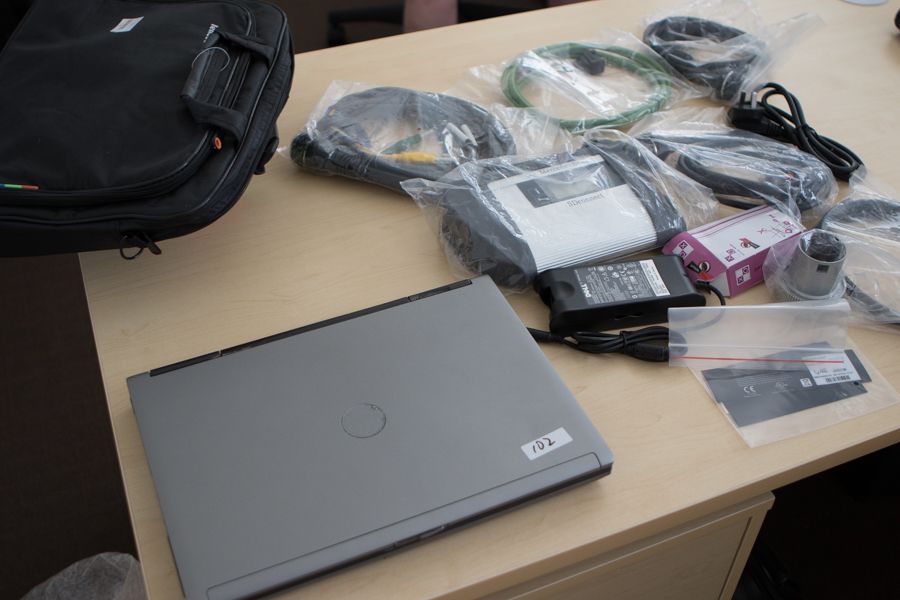
Items removed, we had essentially all the parts I listed in the intro – plus a carry bag for the laptop, a very ordinary USB mouse, plus power adapter and cable to match your country (which was a nice surprise).

Overall – everything seemed quite OK and arrived safely. The computer was a tad old and cosmetically damaged (to be expected) but everything is fully functional.
OK, enough of the package – let’s look at each component in more detail.

3. The Computer (Dell Latitude D630)

The computer of choice for most vendors is a Dell Latitude D630. There are other options out there but this is by far the most common. Also on sale with most vendors is a Dell630 hard drive which is obviously the favored option if you already have a laptop to suit.

Note that the original computer equipment which MB Techs use are based on Panasonic hardware I believe (e.g. Toughbook), providing a touch screen interface. So this begs the question – why the antiquated Dell hardware? I don’t have a full answer but what I have determined is that it’s large due to historic dependencies. The Dell 630 was used for a long time due to the fact that it had a real serial RS232 serial COM port. With the previous generation of multiplexer units you needed that port.

With the advent of wireless and network cable connections to the multiplexer units, there’s no longer a reliance on the RS232 port and hence you can now find sellers who use IBM machines or EVG7 Tablet PCslate computers. The Dell is by all accounts an old reliable war horse which is cheap to get and source parts for, so it’ll probably be seen for a while yet.

4. The SD connect C4 Multiplexer

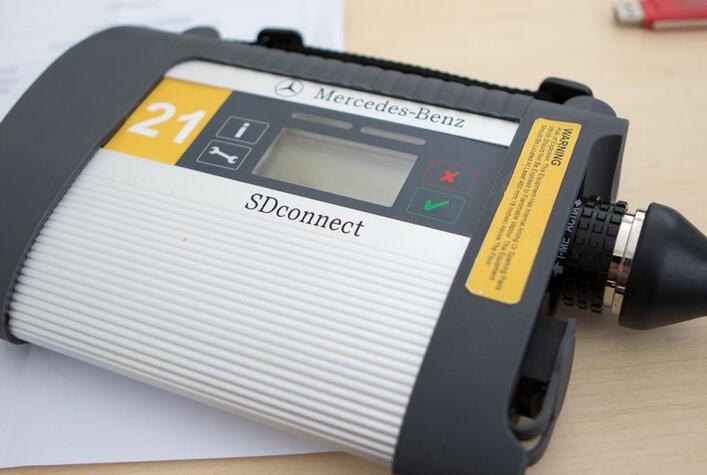
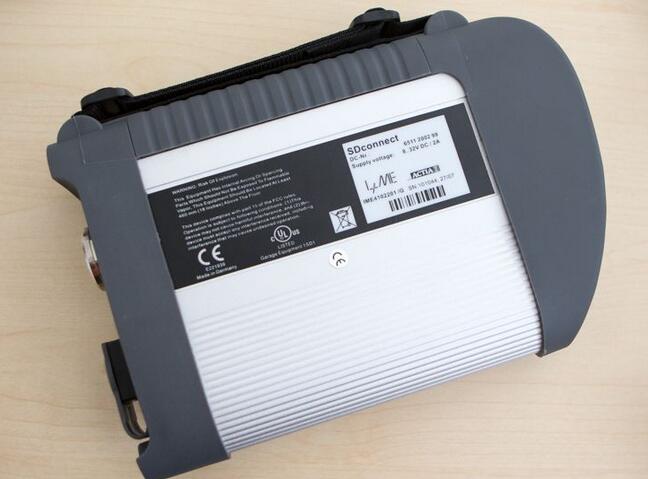
“What’s a multiplexer” I hear you mutter .. well, I’m glad you asked. The SDconnect is the communications interface between the car and the diagnostic computer system (i.e. the Dell). The unit sends fault detection data to the host computer and instructions back to the vehicle. In basic terms, it’s a tool that enables the diagnostic technician to examine vehicle functions, perform data coding and update vehicle software. It knows the communications protocols which the car utilizes to talk to the outside world. Like wow man! (hang on, I need to spin the propeller on my cap). Now, let’s carry on.

The SDConnect 4 is the previous generation multiplexer used on Mercedes vehicles. It is now superseded by the SD connect C5 and although they are starting to appear in cloned form, the c4 is still one of the most prominent cloned multiplexers out there. You can buy a C5 multiplexer if you wish (and for certain new hybrids vehicles you may have to), but for most W205 variants the C4 will do just fine. The SDconnect 4 is wireless enabled (via a plugin card; note not all vendors will sell it with this included, so buyer beware) or it can be connected via a network cable.
sd-connect-c4-package-2sd-connect-c4-package-3
sd-connect-c4-package-3

The plastic end parts can be removed to reveal the slot for the WiFi card, plus the battery compartment and SD Card slot.

sd-connect-c4-package-4

Note that the battery compartment holds six AA rechargeable NiMH batteries to support powering the multiplexer whilst not connected to a vehicle. My unit shipped without batteries (boo!) which I then rushed out to purchase separately. Whether you really need to place batteries into the device is questionable however. There is no charger which ships with the multiplexer, so unless you use it a lot, the batteries will go flat quite quickly anyway. OEM equipment has a charger (which plugs into the RJ45 port) but I’ve never seen a single Chinese vendor selling one. In my tests I found that the unit seems to behave exactly the same, whether there’s batteries in it or not – although batteries do eliminate the “Low battery” indication which is otherwise shown on the LCD.

On the opposite side you will see the RJ45 network port for connecting your diagnostics computer (seen below on left with grey flip cover) and the MB proprietary cable connect (on right) which goes to the vehicle. For the W205, you will only need the OBD cable. The kit however comes with cables to suit all older style cars, trucks etc. as well.

sd-connect-c4-package-5

one thing that impressed me with this particular kit was the quality of the connectors and cables. Everything seemed very good I must say.

Top of the unit has a backlit LCD display, two LED indicators, and four buttons. The LCD indicates Power Supply status, Connection Type, and Working Status. The LEDs are used to indicate a variety of working status signals and the buttons give you the option to bring up information about vehicle or device battery status, display network addresses, put the unit into standby and so forth.

Essentially there is not much that the unit does on its own; not even an OBD scan or the like. It needs to be connected to the car and a computer to represent any value.

5. The Software

Now this is where the fun and games really start. Boot up your laptop and you’re soon presented with a Windows XP OS, which has obviously been customized to the Mercedes Software installed on the device. An early indication of that is the taskbar which prominently displays connectivity between the computer, the multiplexer and associated networks (e.g. internet/server) in the lower right of screen.

There is a lot to learn here for newcomers. The software changes very regularly (sometimes monthly) to keep up with the latest developments. Not surprisingly the vendors from China seem to have their finger on the pulse quite well in that regard. My kit contained December 2015 versions. I don’t think there’s any need for concern with constant updates however. If you can diagnose your car with the modules on-board then you’re good to go. The Workshop info will probably be one of the benefactors of regular updates but most of that service info is already in abundance, as you will see later.

Without writing the Never Ending Story here, let’s just say that the software suite is extremely comprehensive and caters for not only passenger vehicles but also trucks, buses, cranes – and other large industrial equipment dating back through the ages. To keep this piece relevant, I’m going to focus, as best I can, only on the bits applicable the W205.

I also will not go into the various configuration software components, such as installation, authentication, key security, registration, connectivity and so forth. If you are curious, feel free to PM me or do some Googling on the net because there is adequate information out there if you’re willing to look for it.

Let’s look at the main sub components to the suite that are of interest to us:

XENTRY Diagnostics
Not to be confused with XENTRY DAS (Diagnosis Assistance System; which was predominantly used with older vehicles – I think up to the W204). This is the primary diagnostic suite for the vehicle and probably the main software you would tend to use with a car like the W205.

Xentry allows you to delve into each control unit of your vehicle and see configuration data as well as run a very large number of diagnostic tests. It provides you with an exceptionally comprehensive diagnostic tool to see exactly what the various systems of the vehicle are doing.

What is exceptionally nice is that XENTRY also provides you with a full troubleshooting workflow; meaning that once you have run a test, found a fault, you can then delve straight into relevant maintenance references and associated documentation.

I’ve always owned workshop maintenance books for my vehicles, but have to say this system is by far the most well thought out and comprehensive. Not so say it doesn’t have it’s quirks, but it is not overly difficult to come to terms with.

As a side note, XENTRY also comes with a simulated variant (as a learning tool for working the software whilst disconnected from a vehicle. It allows the operator to generate simulated fault codes which you can then diagnose in XENTRY).

EWA Net
This is an intranet web server that hosts two important applications:

Electronic Parts Catalog (EPC)
A comprehensive listing of all vehicle parts; broken down into sub systems. It allows you to quickly build shopping lists of components (e.g. when needed for repair).

Workshop Information System (WIS)
An extremely comprehensive web information system which details the functional components of the car (categorized into sub systems again). It also comes with workshop instructions for performing almost every type of maintenance task, maintenance bulletins and a free set of steak knives.

The WIS is also equipped with several sub-application modules, which although not doubt hold lots of value in a workshop context, are otherwise uninteresting for an amateur user:

ASRA – a German acronym (for Arbeitstexte, Standardtexte, Richtzeiten, und Arbeitswerte). Provides info on work units and relevant documentation for conducting various maintenance tasks.

SSL module – another German acronym (Schadensschlüssel) meaning Damage Code.

MSS module (Maintenance Service System) which displays maintenance documents relevant to maintenance cases.

WSM module (WIS Service Media). This is probably the only sub module to WIS to remain of interest to persons other than MB staff. It contains a web link to a multimedia library for many maintenance tasks. Very cool.

Daimler AG Price List
This is an Access database for Mercedes Benz European parts pricing – equal parts scary and interesting!

What can you do?

So what’s possible with a kit like this, you ask. You would see by now, that the software will provide you with an astonishing array of information to come to terms with. I won’t say the possibilities are endless, but they are certainly vast.

From a learning perspective – you have everything you could wish for. Theoretically you could be satisfied with a copy of the WIS alone, since that serves as probably the most comprehensive learning tool for the vehicle.

From a diagnostics perspective – you will be satisfied with multiplexer and XENTRY. The range of tests which you can run and actuations you can trigger will let you fully examine each part of the car. You can generate detailed test reports, seeing when faults occurred exactly in each of the computer modules – and believe me, there are a lot of those. The W205 has upwards of 50 control units with each of those capable of logging and tracing out detailed errors and fault finding.

From a configuration (Adaptations) aspect, there are some minor things (often referred to as ‘Teach-in processes’) possible (e.g. Airmatic level calibration) but it isn’t a treasure trove for those willing to tinker with the vehicle (see next topic). One aspect I also didn’t delve into further within this review is that you can also configure and update module software from within XENTRY (a process called SCN Coding) which is only available online for the W205 (i.e. you need an authorized Mercedes user account to do so). There are Chinese vendors who will sell you a ‘session’ for online SCN, but it can get expensive quite quickly. In reality it is not something you would do other than to perform major update tasks (e.g. after replacing an ECU or other module) if the car was outside of warranty.

7. What can’t you do?

If you’re looking at ways to change significant default behaviors in the W205 vehicle systems (e.g. allow Video in motion, disable your start-stop, change variant codes etc. ) then you will probably be disappointed. MB has gone to some length to ensure that certain changes are extremely difficult to achieve. Offline coding was to a large extend abandoned with the W204 to guard against incorrect configurations. That’s not to say there isn’t a way, rather that these lock-downs are probably in place to avoid introducing configuration errors inadvertently during maintenance or by amateurs who don’t know what they’re doing.

There are more extensive changes possible with a software product called Vediamo, which is a factory tool used to perform complex black magic best not brought up in this review (makes sign of the cross; heck I’m not even religious!). Regardless of your skills in Vediamo, my research and impression leads me to believe that most changes also require Online SCN coding, which leaves you with little room to achieve known outcomes. Given that people do like to tinker or hack technology I’m sure this topic will become somewhat irrelevant in the future. Yes, people will find a way – whether that’s a good or a bad thing, I shall not judge.

8. Conclusions

So.. your glass of wine is empty and you’re wondering “What the the heck did I just read that for!). If you were to ask me again “Is it worth purchasing a kit like this for your car?” I would offer you an unreserved “Yes” – although with a disclaimer.

If you are the type of person who shows an interested in learning the in’s and out’s of your vehicle, then I can’t think of a better way than to own one of these setups. There is such a vast amount of content and useful reference material that it serves as a valuable library to learn more. Whether your goal is to perform self-maintenance, troubleshoot issues or simply to see for yourself what is going on inside of your vehicle, then this is without a doubt the toolset which allows you to do so.

If on the other hand you would prefer to say “here you go – fix it”, or perhaps rather be ‘told what’s wrong’ with your car, rather than ‘know what’s wrong’, perhaps you’re better off saving your dollars for other toys.

The W205 is undoubtedly a computerized marvel on wheels. Many of the systems and technical aspects of the car are completely obfuscated from the regular plebs like us. A diagnostic kit such as this certainly allows you to delve under the covers and go as deep as your curiosity wants.


:: برچسب‌ها: MB Star C4 SD Connect,benz star c4,Star C4,MB SD Connect C4,MB Star Diagnosis C4,MB SD C4 Star Diagnostic Tool,SDconnect C4, ,
:: بازدید از این مطلب : 156
|
امتیاز مطلب : 0
|
تعداد امتیازدهندگان : 0
|
مجموع امتیاز : 0
تاریخ انتشار : جمعه 7 تير 1398 | نظرات ()
نوشته شده توسط : Likaibin

You will need a GM Tech 2 Scan Tool with it’s 32MB card (updated) and the CANdi module. I have seen the pair sell for as cheap as $250 on obd2tool.com and as much as $3000 off eBay.
Btw, if you look for a decent tool for use only, it’s ok to have a cheap but functional china clone.
Seems like the old answers are a cheaper and easier solution.
1. Have a GM dealer do it
2. Have a locksmith do it
3. Buy the Dorman part that comes with a programming module for less than $80.
Those options are cheaper if you do not have a Tech 2. This is why you will expect to pay for a Tech 2.

Which is like saying it is cheaper to take my car to the shop and have them change the water pump for $100 instead of me going to sears and spending $250 on a cool set of craftsman tools and a toolbox and doing the work myself. Personally, I am heading to Sears, because those tools will keep on saving me money for the rest of my life.

Yes, the Tech 2 does other things besides programming a key fob and you really would have to be a chevy buff / mechanic before it would be worth buying one. The tech 2 is not for everyone.

The Tech 2 is a powerful, versatile hand-held diagnostic computer, designed to help diagnose and repair automotive electronic systems.The Tech 2 supports the changes in the on-board electronic systems for model years 1992 to 2013. With the addition of the CAN Diagnostic Interface (CANdi) module, Tech 2 will support GM on-board electronic systems thru 2013.

The CANdi is an in-cable module that works with existing Tech 2 components including the VCI, cables and adapters to add CAN diagnostic capability to the Tech 2 tester. The CANdi module is fully backward compatible with current Tech 2 functionality and operates transparently when diagnosing non-CAN-equipped vehicles.

The Tech 2 has since been replaced with GM MDI.
Test: Tech 2 programmed key fob to 2006 Chevrolet HHR

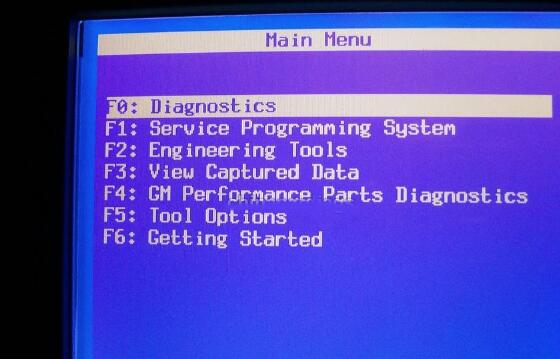
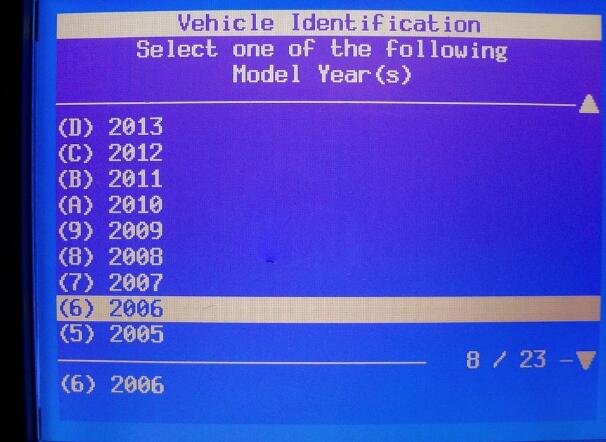
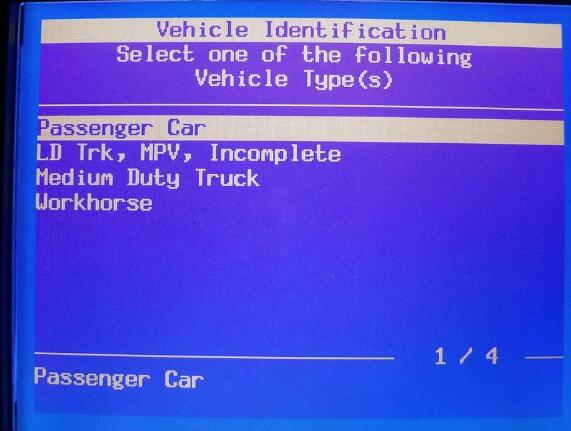
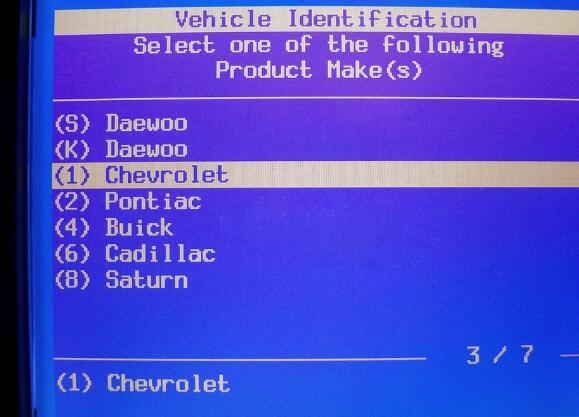
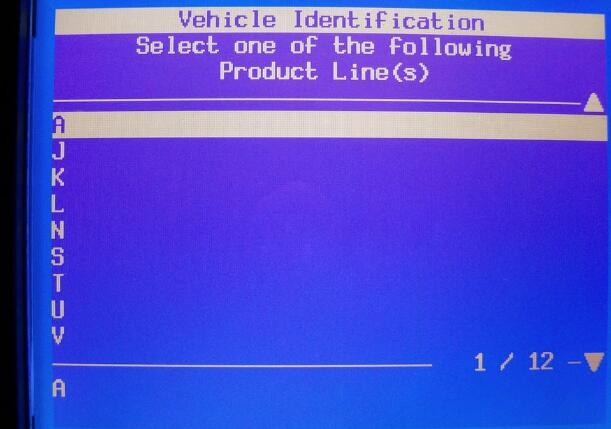
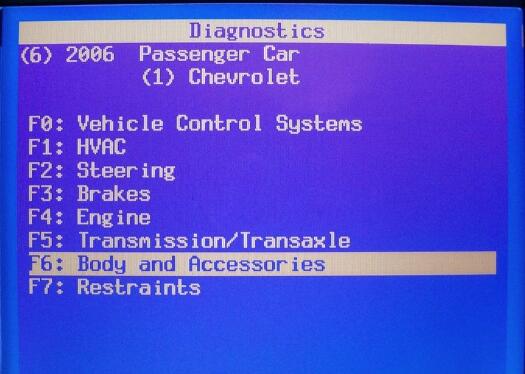
tech2-program-key-fob-Chevrolet-HHR-1tech2-program-key-fob-Chevrolet-HHR-2tech2-program-key-fob-Chevrolet-HHR-3tech2-program-key-fob-Chevrolet-HHR-4tech2-program-key-fob-Chevrolet-HHR-5

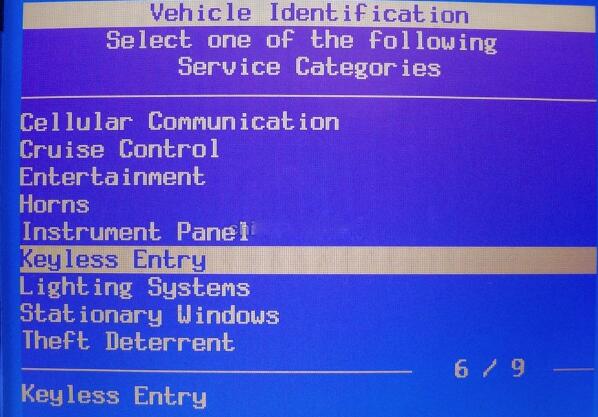
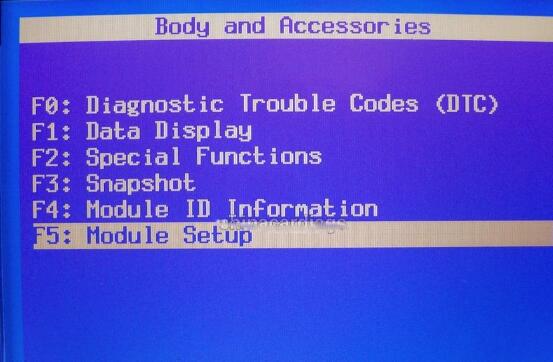
tech2-program-key-fob-Chevrolet-HHR-6tech2-program-key-fob-Chevrolet-HHR-7tech2-program-key-fob-Chevrolet-HHR-8tech2-program-key-fob-Chevrolet-HHR-9tech2-program-key-fob-Chevrolet-HHR-10

tech2-program-key-fob-Chevrolet-HHR-11tech2-program-key-fob-Chevrolet-HHR-12tech2-program-key-fob-Chevrolet-HHR-13tech2-program-key-fob-Chevrolet-HHR-14


:: برچسب‌ها: Tech 2,Tech 2 Scanner,Tech 2 Scan Tool, ,
:: بازدید از این مطلب : 156
|
امتیاز مطلب : 0
|
تعداد امتیازدهندگان : 0
|
مجموع امتیاز : 0
تاریخ انتشار : یک شنبه 2 تير 1398 | نظرات ()
نوشته شده توسط : Likaibin


xentry sd connect c5 manual: How to insert battery pack to C5 unit

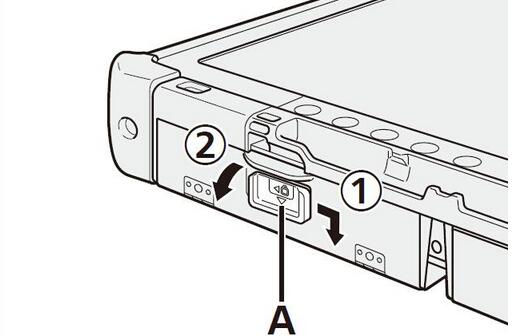
Step 1:Slide the latch (A) in the direction of the arrow.

Step 2:Open the cover.

sdconnect-c5-install-battery-1

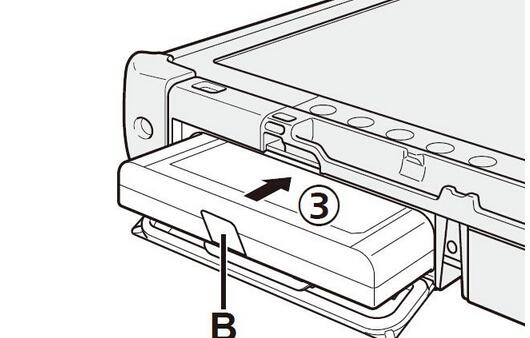
Step 3: Insert the battery pack until it securely fits the connector.
sdconnect-c5-install-battery-2
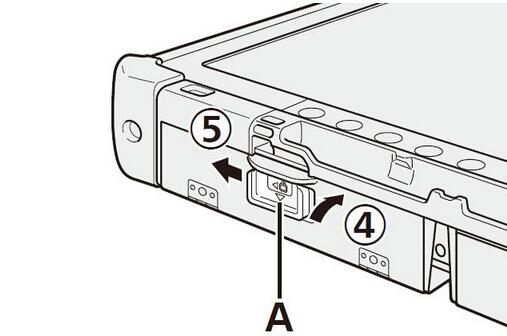
Step 4:Close the cover until it clicks.

Step 5:Slide the latch (A) in the direction of the arrow.

sdconnect-c5-install-battery-3

To remove the battery pack

In step 3above, pull the tab (B) of the battery pack.

CAUTION

Make sure the latch is securely locked. Otherwise the battery pack may fall

when you carry the computer.

NOTE

Note that the computer consumes electricity even when the computer power is

off. If the battery pack is fully charged, the battery will fully discharge in the followingperiod of time:

When power is off: Approx. 9 weeks
In sleep ( )/standby ( ): Approx. 4 days
In hibernation: Approx. 8 days

If “Wake Up from LAN” is disabled, the period of time in sleep will become

slightly longer, and the period of time in hibernation will become about the same

as during power-off.

When the DC plug is not connected to the computer, disconnect the AC cord

from your AC wall outlet. Power is consumed simply by having the AC adaptor

plugged into an electrical outlet.


:: برچسب‌ها: Mercedes BENZ C5,MB STAR C5,Mercedes C5,C5 Star, ,
:: بازدید از این مطلب : 181
|
امتیاز مطلب : 0
|
تعداد امتیازدهندگان : 0
|
مجموع امتیاز : 0
تاریخ انتشار : پنج شنبه 9 خرداد 1398 | نظرات ()
نوشته شده توسط : Likaibin

Have collected all about Audi a4 post-2004 RB8 cluster key learn/program using Xhorse VVDI2 or Abrites AVDI or Fly FVDI.

Look here:

Part 1: VVDI2 and Audi a4 RB8 2004+ key learn (all keys lost)

Part 2: AVDI and Audi a4 RB8 2004+ key program

Part 3: FVDI and Audi a4 RB8 2004+ key learn

in detail…

Part 1: Xhorse VVDI2 – Key learn – Audi a4 RB8 2009 (all keys lost)

Tip:

With Xhorse vvdi2, the procedure to program a new key if all keys are lost is the same as for adding key, the only difference is that at some point you have to disconnect the BCM2 power and reconnect it. Just read the instruction below.

Recommendation:

take out BCM and read BDM file with VVDI2 BDM cable . Then load file, make dealer key and learn keys .

Steps:

1.Connect VVDI2 with computer and your car.

2.Put the new key into VVDI2 programmer.

VVDI2-Audi-A4-B8-2009-All-Keys-Lost-1

3.Start VVDI2 software, and choose Audi.

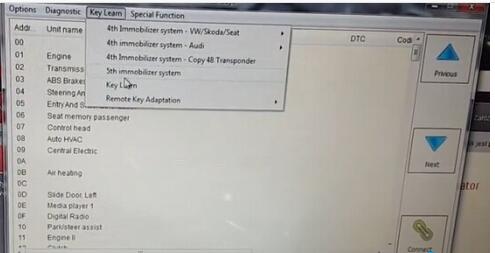
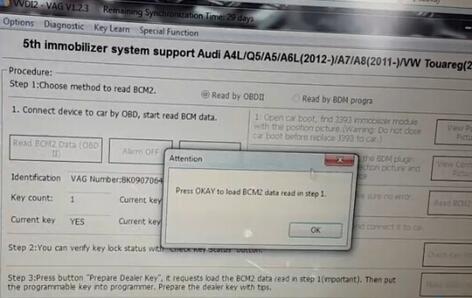
4.Click on “Key Learn>>5th immobilizer system”.

VVDI2-Audi-A4-B8-2009-All-Keys-Lost-2
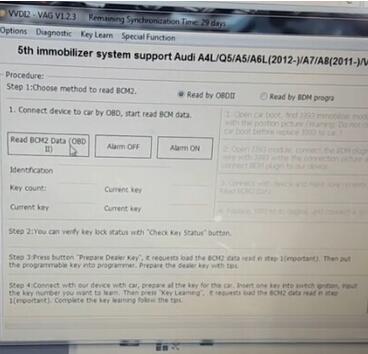
5.Read BCM Data (OBDII).

VVDI2-Audi-A4-B8-2009-All-Keys-Lost-3

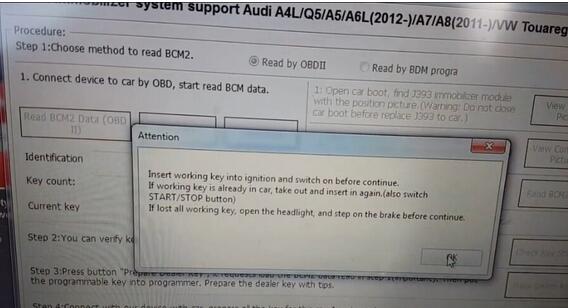
6.Insert a working key to turn on ignition before continue.

VVDI2-Audi-A4-B8-2009-All-Keys-Lost-4

If the key is already in car, you also need to remove it then insert it again.

If you lost all keys, you need to open car headlight and step on the brake before continue.

VVDI2-Audi-A4-B8-2009-All-Keys-Lost-5
VVDI2-Audi-A4-B8-2009-All-Keys-Lost-6

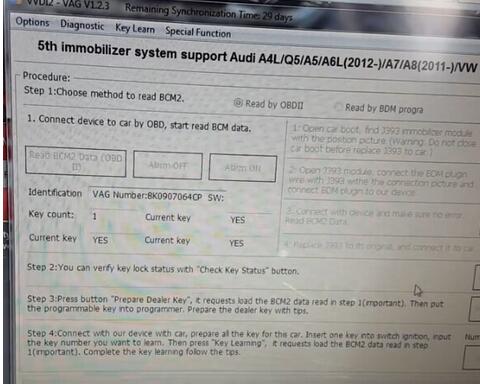
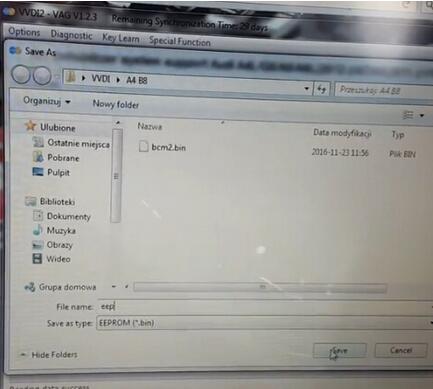
7.Read data success, save the eeprom bin file.
VVDI2-Audi-A4-B8-2009-All-Keys-Lost-7
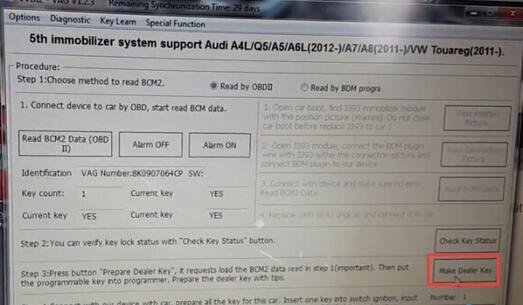
8.Make Dealer Key.

If car is A4/A5/Q5, press YES button to continue, no need working key.

If car is A6/A7/A8/VW Touareg, press NO button because it needs working key. Click on YES.

VVDI2-Audi-A4-B8-2009-All-Keys-Lost-8

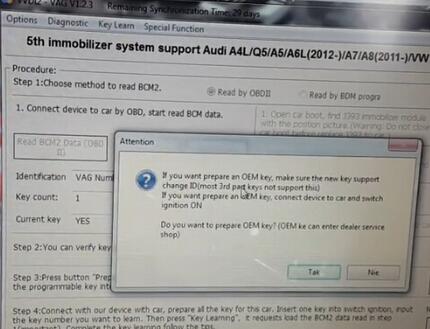
9.If you want to program an OEM key, make sure the new key support change ID. Click on YES.

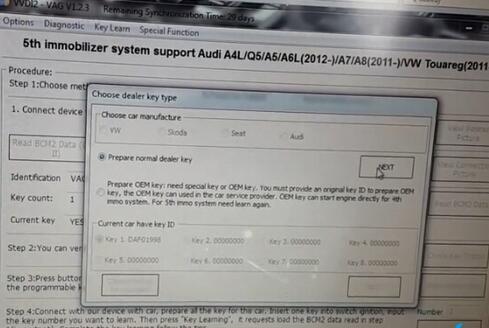
Choose Program normal dealer key option, click Next and OK to load the BCM file.

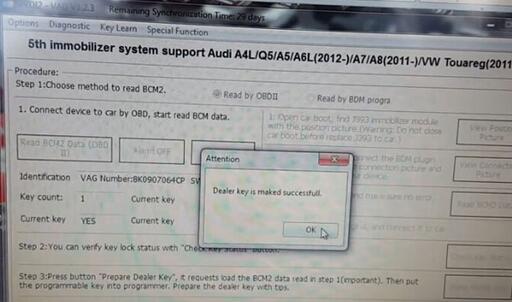
10.OK and VVDI 2 start to program new key.

Wait a minute and VVDI2 make new dealer key successfully!

VVDI2-Audi-A4-B8-2009-All-Keys-Lost-9

VVDI2-Audi-A4-B8-2009-All-Keys-Lost-10

11.Change key number from 1 to 2.

Click on Key Learning then OK to load the BCM bin file.

VVDI2 start learn key.

Use the working key to turn on ignition then insert the new key to learn.

Test the new key; it’s working

VVDI2-Audi-A4-B8-2009-All-Keys-Lost-11

VVDI2 is able to program a new key to Audi A4 B8 successfully!

Part 2: Abrites AVDI – key program – Audi a4 RB8 2004+

Here are steps of Audi a4 2004+ RB8 cluster key programming

Dealer key preparing and key learning on Audi a4 2004 onwards with abrites 7.4.

Open your Abrites vag commander programme and confirm that the programme finds your interface and your programmer. You should see the following screens if everything is connected.

Once open you should be prompted with the screen below. Under the special functions tab select key learning.

Once you have selected key learning you should be shown the following screen.

Select the down tab and select the Audi A4 2004+ [RB8 instrument cluster KW2000] selection.

Once you have selected this you should get the following screen.

Once you have entered your new key count then if you have a dealer key ordered to the vin number then select “Learn” this will start the key learning procedure follow any prompts that appear.

Once completed you will be prompted with a window saying all keys successfully programmed.

Key programming is now complete and you should turn ignition off and back on and now try to start the vehicle.

If you are using the special transponder chips to create a dealer key the follow this procedure. Enter your new key count as described above and then select  “Program dealer key“.

It will now connect to the RB8 to retrieve the component security to prepare the dealer key.

Once it’s retrieved the component security then it will prompt you saying place a TA5 into the programmer to prepare the dealer key. Once you have done this select ok and at the bottom left of the window you will see the message communicating with the transponder (this may take some time).

Once this process is completed you will be prompted saying transponder is now prepared and can be learnt to instrument cluster. Select ok.

Make sure that the transponder is key blank and this is in the ‘On’ position in the ignition. Now you can learn the key as if you had bought it from the dealer to the vin number.

To programme the key follow the procedure above as if it is a dealer supplied key

Part 3: Fly FVDI – key learn – Audi a4 RB8 2004+

It’s OviStar67’s story with Audi A6 2006 lost key situation:

The client had lost remote key and did tried to start the car with service plastic key (with id48 tp inside) and no success. Maybe somebody before did program other keys and forgot about the service key.
Dash shows “L7 2-2” instead of mileage.

I did precoded id48 for Audi with Tag Key tool from FVDI and did program again using both options standard/wizard learning option from VAG Commander v24. If not detected automatically select “Audi RB8 2004+ …” option, fill how many keys you want to program and hit learn without filling the PIN.
The system will work smooth and program the keys just follow on screen instructions.

Tip: Because RB4/RB8 is crypto even if you have good PIN is not accepting the code.

In this case after learning the system did not return to L6 state (normal mode) and immediately shows mileage.

In some cases “L0 2-2” it shows when accidental learning procedure is stopped (power lost etc).

To solve this read instrument cluster eeprom and change the state from 7 to 6 and hit update.

some advice

before do any key programming on any of the cars that need pre coded chips with component security then always make some backups first before playing.

Back up the eeprom in dash board and also the ecu config data . That way can go back to start and avoid having to fix def or L7 2-2 errors

That it.

Good luck and please excuse my rough language or my lack of technical details.


:: برچسب‌ها: ABRITES Commander, AVDI ABRITES Commander, ,
:: بازدید از این مطلب : 159
|
امتیاز مطلب : 0
|
تعداد امتیازدهندگان : 0
|
مجموع امتیاز : 0
تاریخ انتشار : دو شنبه 30 ارديبهشت 1398 | نظرات ()
نوشته شده توسط : Likaibin

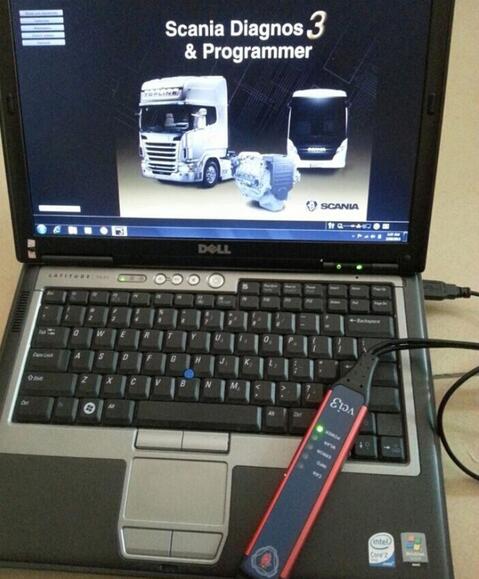
Newest Wifi wireless Scania VCI-3 SDP3 Diagnostic Tool  is designed to work with latest Scania trucks, buses and other heavy vehicles. The latest Scania SDP3 v2.24 software can be downloaded free here:

Free download Scania VCI3 SDP3 (Scania Diagnostic & Programming 3) V2.24

Scania VCI 3 SDP3 V2.24 1

Scania VCI 3 SDP3 V2.24 2

Scania VCI 3 SDP3 V2.24 3

Scania VCI 3 SDP3 V2.24 4

Scania VCI 3 SDP3 V2.24 5

Scania VCI 3 SDP3 V2.24 6

Scania VCI 3 SDP3 V2.24 7

Note: The Scania SDP3 sofwtare v2.24 is for Wifi VCI3 truck diagnostic interface not for Scania VCI2 without USB dongle.  Scania VCI3 wifi heavy duty diagnostic scanner comes with latest version of SDP3 (2.24) and USB license key (HASP key)

Scania-SDP3-VCI3

Software version: V2.24
Optional Software:
XCOM 2.26 – diagnostic software for chiptunning

Operating system: Windows 7 32-bit

Update: free update online

Support All Scania Trucks, Buses and other Heavy Vehicles or Heavy Duty Engines Made by Scania

Multi-language: English/ German/ Spanish/ French/ Japanese/ Dutch/ Polish/ Portuguese/ Swedish/ Norwegian/ Suomi/ Turkish/ Italian/ Czech/ Russian/ Chinese.

scania-vci3-sdp3

SCANIA VCI3 Functions & Features:
1. Scania VCI3 is designed to support all Scania diagnostic systems based on CAN network, it’s a extremely fast yet very compact diagnostic tool.
2. One of the most interesting new features that can be found in Scania VCI3 is a Wifi wireless connection (also there is a USB connector for wired connection).
3. From now you can work without wired connection to your truck, just forget these problems like damaged data cables and other disadvantages of wired connections.
4. Software support for Scania VCI3 appeared in Scania SDP3 2.18 version so if you want to use this tool you need this version of SDP3 or later versions of this software.
5. The device is designed for full service trucks, buses and other heavy vehicles, which produces the corporation SCANIA. Adapter works in conjunction with software SDP-3.
6. The adapter does not work with trucks and engines manufactured before 2004.
7. The main feature of VCI-3 – Work through a high-speed WI-FI connection. Also in the device has a USB port.


:: برچسب‌ها: Scania VCI-3,Scania VCI3,Latest scana vci3,scania vci3 wifi, ,
:: بازدید از این مطلب : 172
|
امتیاز مطلب : 0
|
تعداد امتیازدهندگان : 0
|
مجموع امتیاز : 0
تاریخ انتشار : پنج شنبه 12 ارديبهشت 1398 | نظرات ()