|
|
|
نوشته شده توسط : Likaibin
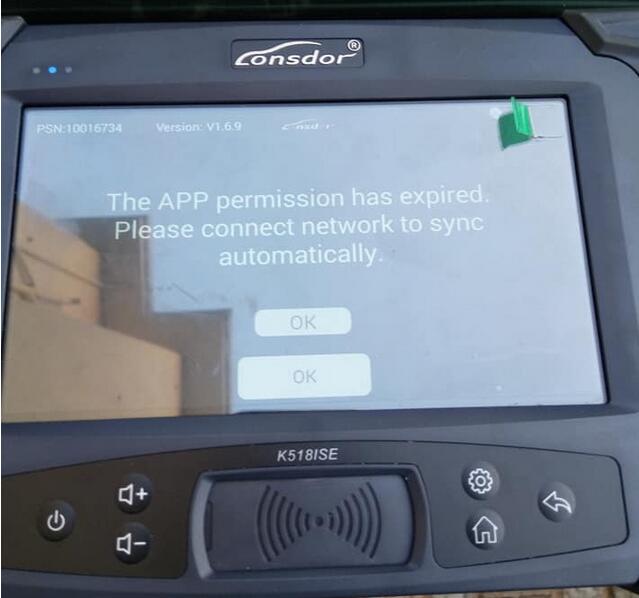
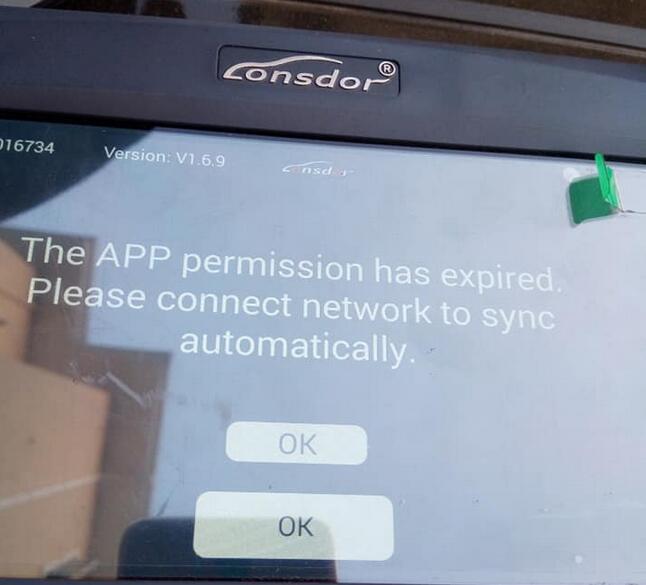
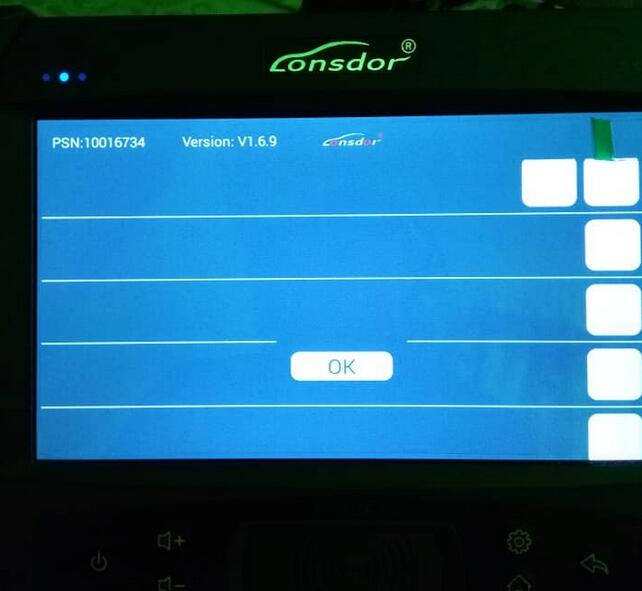
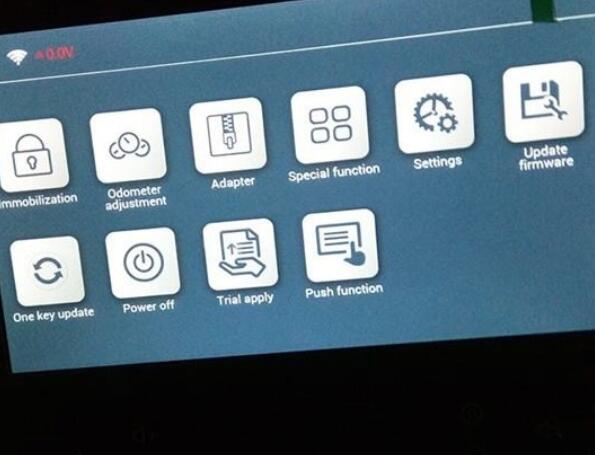
Lonsdor K518ISE Key Programmer displays the error message:
The APP permission has expired
Please connect network to sync automatically
No worries!
Issue will be resolved because it’s the internet problem only
Lonsdor K518ise on Obd2tool.com tech support
:: برچسبها:
Lonsdor K518ISE Key Programmer,Lonsdor K518 key programmer,Lonsdor K518,Lonsdor K518ISE,K518ISE,K518ISE key programmer,Key Programming Device,Key Programming tool,Best Programming tool, ,
:: بازدید از این مطلب : 257
|
امتیاز مطلب : 0
|
تعداد امتیازدهندگان : 0
|
مجموع امتیاز : 0
تاریخ انتشار : یک شنبه 18 فروردين 1398 |
نظرات ()
|
|
نوشته شده توسط : Likaibin
Free download Porsche Piwis ii 18.5000 software:
Tested version:
this piwis ii 18.500 sw has been tested successfully with porsche piwis tester ii yanhua (china clone)
confirmed to work perfect in diagnosis, coding and programming
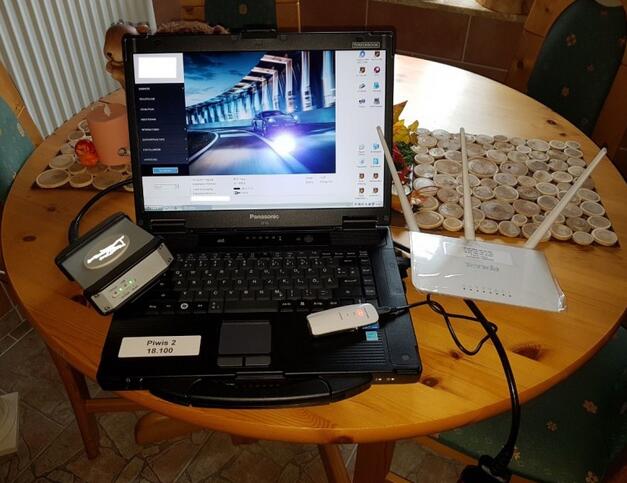
Free version : (it’s your own risk)
https://mega.nz/#F!XvhhTQpb!qzZn4vSeYeFx8K13SZLAWQ (Size : 11.80 GB)
Part 1 – 7C936553A73B75639F88EBABA96F2F0C
Part 2 – A8DDA2C9773E71C7340BF48BA077501B
Part 3 – 612D64136972570B345C5483008A2395
Part 4 – 436A8762B7A49CEFE2BCD9CE50C53FD4
Part 5 – 23CB220A8E44E405F6FCC49830B512B3
Part 6 – E35AD19B6AC17E5BC4C130029A417AEB
Part 7 – 889DD8C1E3C660D58984E9D06F3E09BE
Part 8 – 7968493EB6A5E72D723E6E236CDAFF9B
Part 9 – EEB2558774F18006AADAB28F906CA426
Part 10 – 2290ABED24E214D2DD10505FE4059726
Part 11 – D3BD9257E56A424EA63153415ABC31E1
Part 12 – A474C378EF06CAA7A41F3EA17F2212B0
Part 13 – 9945E99DA5D6866ACF78D44069311138
Part 14 – 41639ED7FB9B1C3AC99D1A967B41EC98
Part 15 – 1B319BB22FC5C035A0664BFB29DA84D5
Part 16 – 7103CDC6DFF96911B6D1008C1331A1EF
Part 17 – 4D0D24480B0561345C1EDDC54DFD9A92
Part 18 – F976327463820686714D8F046F9ADE26
This Image is based on acronis image by kiranabc
I made some modifications:
* Win XP tweaks (enable right click on taskbar, enabled win xp start menu etc)
* Win XP activated (no more 3 days left to activate errors)
* Windows XP fully updated from Windows Update
* Uninstalled all Panasonic drivers and other drivers not critical to the system (for making it into universal image)
* Made into universal image (can restore to VM or any laptop compatible with Windows XP)
* Deleted un-necessary files
* Uninstalled POSES and PET (to make download smaller, can re-install them if you wish – refer folder “Hardlock fix for installing PET and POSES”)
* changed adobe reader from German to English
* Updated WinRAR
* 100% defragmented image – the image will restore into a single contiguous portion
* Restored Size ~ 17.9 GB (this is excluding pagefile storage)
NOTE: Even though the PIWIS version is shown as 18.150.500, this might only be a 18.100 as some PIWIS experts on this forum have debunked the existence of 18.150.500 and stated that in this image simply registry edited to display the version as 18.150.500
Installation overview:
1. Boot the recovery CD (in the archive)
2. Restore Image
3. Install / restore drivers (if restoring to a VM, install guest additions)
4. Perform Imprint
5. Done
All detailed step-by-step instructions are in the archive (in folder “README”).
Theoretically this image should be able to restore and boot into any laptop which supports Windows XP (hopefully no BSOD on booting). Also you can restore it to a Virtual Machine
My aim with this image was to create an PIWIS image that anyone can restore and use without any difficulty.
This image might be more suited to someone restoring it to a laptop other than a Panasonic CF-30 as I have removed all the Panasonic drivers. You can restore it to a CF-30, just need to reinstall / restore all the drivers
Easiest method to re-install drivers – In the laptop you are planning to restore the image -> If you are already running Win XP in that laptop, use software called “Double Driver” to backup all the drivers. After restoring the PIWIS image, restore the drivers – hardly take 5-10 min for complete driver restore and it’s all one-click operation.
Installation on VMware:
Restore to VM – here is how I usually do it:
1. Create two virtual hard drives – lets say – VHD-A and VHD-B;
VHD-A will be the main VHD of your VM into which you are restoring the image.
VHD-B is just a temporary VHD to hold the image file for restore
2. Copy the image file (.adi file) into VHD-B
3. Attach both VHD-A and VHD-B to the VM
4. In the VMs CD drive, mount the recovery disc iso
5. Start the VM and boot into the recovery CD
6. Follow the instructions given in the archive to restore the image
7. After image finish restoring, turn off the VM and detach VHD-B and unmount the recovery disc iso from the VM
8. Start the VM – after it finish initializing, install guest additions.
9. Done – you can delete VHD-B from your system
Piwis ii v18 questions and answers:
Q: Can I ask, why is there 18 parts to this download? ive downloaded these 18 parts and each of the parts all seem to have disc images, which one is the PIWIS image to burn to disc.
A: You need a laptop running windows xp OR
if you have a decently powerful laptop (Windows 7 / 10 with at least 4GB RAM), you don’t need to buy an additional laptop – you can run this on virtual machine.
Q: Has anyone test this image on Dell630, Dell6430 or Panasonic CF-D1?
A: Theoretically it should work on any laptop which runs windows XP as I made the image a universal image which can restore to any laptop.
I have 2 notebooks, IBM win xp and HP win 7. better XP native or better virtual machine?
Native should perform better
:: برچسبها:
Porsche Piwis 2,piwis 2,piwis tester 2,Piwis II tester,porsche piwis ii, ,
:: بازدید از این مطلب : 211
|
امتیاز مطلب : 4
|
تعداد امتیازدهندگان : 1
|
مجموع امتیاز : 1
تاریخ انتشار : یک شنبه 26 اسفند 1397 |
نظرات ()
|
|
نوشته شده توسط : Likaibin
How to solve: Autel J2534 pass thru FOR EVERY YEAR, MAKE AND MODEL
Man! I finally figured it out!
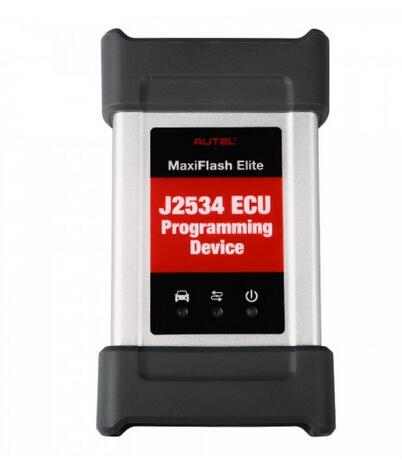
CIP (Coding Individualization and Programming), using Autel Maxisys J2534 pass thru FOR EVERY YEAR, MAKE AND MODEL — can be done!
First, my bad experience with Autel customer service. I messaged Autel by email, and I was surprised on how fasted there responded, but they didn’t even help me out. A 10/10 for customer reply but a 0/10 for help! But anyways here their first email I sent them and here what they said
“Dear customer,
Thanks for your feedback!
Please kindly be noted that programming ECU on Japanese cars is not developed yet. ”
Then I ask them when will the Japanese cars be available they said “No plan to develop programming ECU for Honda, Toyota, Nissan, Acura, Etc.”
Then I ask them what cars are available they said “Most of the Bmw and Benz cars.”
So basically I felt like I got rip off because them calm they can do programming, CIP, etc. on all most every car that is stated in their youtube videos. They should have a list of all the cars, and manufacturers who Autel supports.
So with the Maxisys Elite and Autel Maxisys Pro if you have the J2534 ECU Programming Device you can program or do the ECU update. (BUT NOT THROUGH AUTEL ON ALL CARS ECU) you will have to contact the manufacturer site of that vehicle that you plan to do the Flashing.
THINGS YOU NEED!
* AUTEL J2534 ECU Programming Device
* AUTEL J2534 ECU Programming Device Cable to connect to a Laptop to the J2534 ECU Programming Device Via the USB port
* a “WINDOWS” laptop. because none of the automotive manufacturers makes software for Apple Computer ( P.S you can run Boot camp on your mac to install windwows 10. but windows 7 and windows XP isn’t supported on boot camp)
* Many automotive manufacturers programs run on Windows 10 (MANY BUT NOT ALL). If the program fails or isn’t working correctly, you need a (WINDOWS 7 OR WINDOWS XP operating system it’s usually stated in their requirements what is supported and what is not). (the automotive manufacturers try to make the most money they can get so that why SOME automotive manufacturers company don’t update their flashing programs to the latest operation system like Windows 10 etc. beacuse they don’t want to spend thousand if not even millions to updated everything and testing and debugging)
* The Internet with excellent wifi connection ( if your wifi goes out due to a bad or weak internet connection while updating, programming, etc. a car ECU you can fry, brick the ECU) so make sure you have an excellent internet connection.
* Jump box or anything to charge the vehicle battery while updating, (if the car battery dies while an ECU updated you can fry, brick, break, etc. the ECU)
* You will need to “BUY A SUBSRCITION” from the manufacturer website of that vehicle you’re going to do to have access to the flashing software, and from there you can download their software.(EACH MANIFUACTURE has their own website with their own flashing software. So yes you need to buy a subscription for every different car year and model. For every manufacturer out there to be able to do different vehicles) Don’t worry they all offer different plans so lets so your woking on a car for a one time use they offer different plans pick whatever plans suits you. They have one day from $10-$25 to a year from $1,250-$1,800+.
MANIFUCATEERS WEBSITES FOR FLASHING SOFTWARE/SUBSCRIPTIONS LINKS
“Acura, Honda” : http://www.serviceexpress.honda.com/
“Audi” : http://erwin.audiusa.com
“BMW”: http://www.bmwtechinfo.com/
“Chrysler, Dodge, Jeep, Eagle, Plymouth”: http://www.techauthority.com
“Ferrari” : http://www.ferraritechinfo.com
“Ford, Lincoln, Mercury” : http://www.motorcraftservice.com/
“GM – Buick, Cadillac, Chevrolet, GMC, GEO, Hummer, Oldsmobile, Pontiac, Saturn” : http://www.gmtechinfo.com/
“Hyundai” : http://www.hmaservice.com
“Infiniti” : http://www.infiniti-techinfo.com
“Isuzu” : http://www.isuzutechinfo.com/
“Jaguar” : http://topix.jaguar.jlrext.com/topix/i18n/index
“Kia” :* http://www.kiatechinfo.com
“Land Rover” : http://www.landrovertechinfo.com/
“Lexus” :* http://techinfo.lexus.com
“Maserati” : http://maseratitechinfo.com
“Mazda” : http://www.mazdaserviceinfo.com/
“Mercedes-Benz” : http://www.startekinfo.com/
“Mini” :* http://www.minitechinfo.com/
“Mitsubishi” : http://www.mitsubishitechinfo.com/
“Nissan” : http://www.nissan-techinfo.com
“Porsche” : https://techinfo2.porsche.com/PAGInfosystem/VFModuleManager?Type=GVOStart
“Saab” :* http://epsiportal.com/Site/
“Subaru” : http://techinfo.subaru.com
“Suzuki” :* http://www.suzukipitstopplus.com
“Toyota, Scion ” :* http://techinfo.toyota.com/
“Volkswagen” : http://erwin.vw.com
“Volvo ” : http://www.volvotechinfo.com/
***!DISCALMAER!: I HAVE NOT TESTED EVERY MANIFUCUTE WEBSITE, AND CAN’T TELL YOU IF THE AUTEL J2534 ECU PROGRAMING DEVICE IS COMPABLIE WITH THERE SOFTWARE. I TRIED MANY MANIFUCUTE WEBSITE AND SEEMED TO WORK FINE SO FAR.!***
***PLEASE IF YOU TRY ONE THESE UPDATES, FLASHING ETC, PLEASE POST IF IT WAS COMPLAIBLE WITH THE AUTEL J2534 ECU PROGRAMING DEVICE SO OTHER CAN VERIFY THAT IT WORKS***
***REMEMBER AUTEL SUPPORTS MOST OF THE BMW AND BENZ CARS SO NO NEED TO BUY AN SUBSCRTION FROM THOSE MANIFUCTERS.***
WEBSITE FLASHING SOFTWARE THAT IS COMPATIBLE WITH Autel Scanner J2534 ECU PROGRAMING DEVICE CONFIRMED (I will try to post the websites flashing software that worked with Autel if not please post down below that it did work.)
:: برچسبها:
Autel Maxisys Elite,Maxisys Elite,Maxisys,Autel Scan Tool,ECU Programming,Auteltech Scan Tool,Autel Elite,Autel OBD2 Scanner,Elite Diagnostics,Autel J2534, ,
:: بازدید از این مطلب : 185
|
امتیاز مطلب : 0
|
تعداد امتیازدهندگان : 0
|
مجموع امتیاز : 0
تاریخ انتشار : چهار شنبه 15 اسفند 1397 |
نظرات ()
|
|
نوشته شده توسط : Likaibin
Original Autel automotive diagnostic system Maxisys MS908P, MS908, MS906, MS906BT etc released new update on October 29th, 2018.
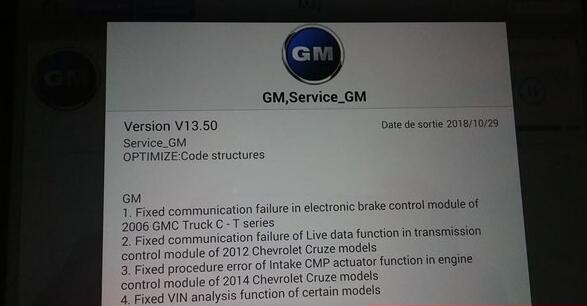
GM,Service_GM
Version V13.50
Service_GM
OPTIMIZE:Code structures
Date 2018/10/29
GM
1. Fixed communication failure in electronic brake control module of 2006 GMC Truck C – T series
2. Fixed communication failure of Live data function in transmission control module of 2012 Chevrolet Cruze models
3. Fixed procedure error of Intake CMP actuator function in engine control module of 2014 Chevrolet Cruze models
4. Fixed VIN analysis function of certain models
:: برچسبها:
Maxisys MS908P, MS908, MS906, MS906BT ,
:: بازدید از این مطلب : 150
|
امتیاز مطلب : 0
|
تعداد امتیازدهندگان : 0
|
مجموع امتیاز : 0
تاریخ انتشار : دو شنبه 5 آذر 1397 |
نظرات ()
|
|
نوشته شده توسط : Likaibin
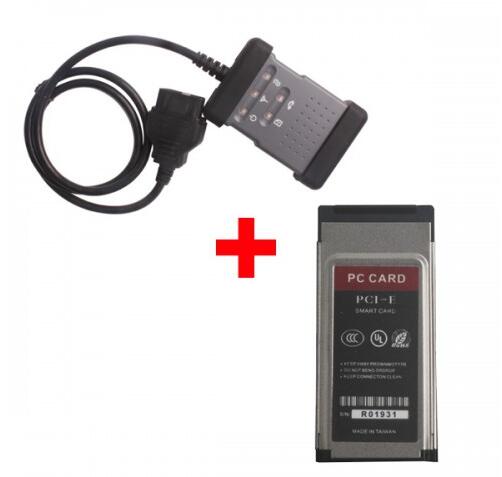
Here is how to use Nissan Consult 3 Plus to do Immo and programming without spending out on the smart card.
find the consult diagnostictool.ini file
open with notepad
copy and paste this at the bottom
——————————————————–
[mode]
debug_mode=TRUE
debug_mode_vehicle-battery=TRUE
[vehicles]
tab_index=0
———————————————————
ALSO, MAKE SURE ACCESS_MODE IS SET TO 1 IN THIS FILE
NOW SAVE AND REOPEN CONSULT…VOILA!!!!!
Here is the location of fille DIAGNOSTICTOOL.INI:
C:\CONSULT-III_plus\System\Application\ApplicationData\CommonSetting\DiagnosticTool.ini
Please just try this at your own risk, I am not responsible the result if you have any question.
I share this because you can do this without spending money to buy the security card.
And this solution is for Car Scanner consult 3 plus.
If you can’t solve this problem, better buy consult 3 plus+ security card for IMMO AND PROGRAMMING.
:: برچسبها:
nissan consult III plus,nissan consult 3 plus,consult 3 plus,consult iii plus software,Consult-3 Plus for Nissan, ,
:: بازدید از این مطلب : 220
|
امتیاز مطلب : 0
|
تعداد امتیازدهندگان : 0
|
مجموع امتیاز : 0
تاریخ انتشار : دو شنبه 21 آبان 1397 |
نظرات ()
|
|
نوشته شده توسط : Likaibin
CANdi adapter user manual for GM Tech 2 clone scanner:
What’s the candi module?
What is the real purpose of the candi module?
What is the CANdi module used for?
What’s the physical interface and LED?
“NO CANDI Communication Established”?
What’s the candi module?
An industry change in protocol from OBD II to Controller Area Network (CAN) is ongoing. In order to perform diagnostics on a vehicle that uses the CAN interface, you will need the Tech 2 and a CAN diagnostic interface module. The CANdi module connects between the Tech 2’s diagnostic link cable and the OBD adapter.


The Controller Area Network Diagnostic Interface (CANdi) is an in-cable module that works with the existing Tech 2 components including the VCI, cables and adapters. Installed, the CANdi module is fully backward compatible with current tester functionality. The module powers up in a way that makes it transparent to the user.
That is, unless the Tech 2 enables features specific to the CANdi module. This allows the existing Tech 2 software to be used with no changes, whether or not the CANdi module is installed.
What is the real purpose of the candi module?
The CANDI module reads the CAN Network on cars that have it. Corvettes 2005 and newer use the CAN Network. Still use a OBDII connector but the Candi module is needed to read the data on the CAN Network.
What is the CANdi module used for?
The primary function of the CANdi module is to add CAN capability to the Tech 2 scan tool.
The CANdi module:
– support simultaneous communications on three CAN buses
– provides high speed UART communications with Tech 2

What’s the physical interface and LED?
CANdi adapter connects the Tech II by way of the existing Data Link Connector (DLC) Burndy Connector. The vehicle side connection remains unchanged using the existing adapter to interface between the Burndy connector and the SAE J1962 connector. When functioning properly, CANdi’s LED flashes. In the vent of a problem,the LED will be constantly illuminated.


How will you do with “NO CANDI Communication Established”?
How-to’s of CANDI module communication errors:
“CANdi module was not detected for Tech2”
Or
“NO CANDI Communication Established”

First, please make sure you plugged the candi adapter in to the car and the tech 2 before powering up
Then, disconnect the connector leaving the candi adapter going to the OBD port. Plug it back in and make sure its real snug, then plug it into the obd port. I need to do this every now and then with my clone one. Usually it works after. Suspect the pins arent making the best contact.
Tech support from professionals:
1. With the car ignition off, connect the GM Tech2 and CANdi module (which is now one long cable).
2. Power up the Tech
3. You’ll get 12V from the DLC (now it takes me a half hour to find the “DLC means” Data Link Connector “and is what we also call the OBD2 connector, so be prepared to be stumped by TLA’s (Three Letter Acronyms)
4. At the main menu press F3-tool options
5. At the tool options screen select F9, CANdi Diagnostics
6. There are two tests on the next screen, run them both. The CANDI should talk to your 2004+ car
7. Either turn the ignition key of the car, or start it (for a C6 there is not an “on”).
8. Press the EXIT button until the Tech 2 goes back to the main menu.
9. Select F0, Diagnostics.
10. Make sure you want to look at the module. You may be choosing body style; You may need the body code (sometimes the third character in the VIN) You may also be asked about certain options, like ZL6. They are on a tag in the glovebox.
11. After that you will be able to play with the Tech2 clone.
IMPORTANT: Sometimes, it’s just problem with candi, as when using on other cars without candi, it’s just perfect. So you should have a good candi such as . It’s just better, but still needs to connect a few times. So I you can buy another card 148. If not totally solved, rewrite the card to 143 and 136. Both work fine. That is, 148 is no good for candi. Could be corrupted software, or the card problem. These cards coming together with Tech 2 are not good sometimes. You’d better but china knock-offs from a man of his word to trust in. Here, obd2tool.com is one of them you can go with.
http://likaibin.blogaholic.se/2018/sep/97193/gm-tech-2-candi-module-user-manual-for-newbies/
:: برچسبها:
Tech 2,Tech 2 Scanner,Tech 2 Scan Tool,GM Tech 2,GM Tech 2 Scanner,Tech2, ,
:: بازدید از این مطلب : 194
|
امتیاز مطلب : 0
|
تعداد امتیازدهندگان : 0
|
مجموع امتیاز : 0
تاریخ انتشار : جمعه 16 شهريور 1397 |
نظرات ()
|
|
نوشته شده توسط : Likaibin
New Super MB STAR C6 is coming! Compare with the old MB star M6, it supports programming & coding on BMW F/ G series cars and DOIP protocol for more than Mercedes.
1.Interfaces
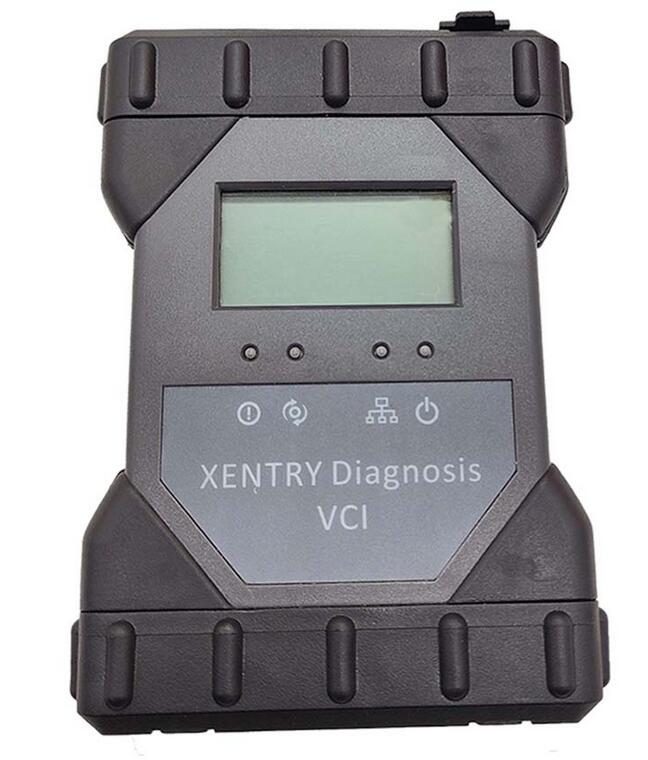
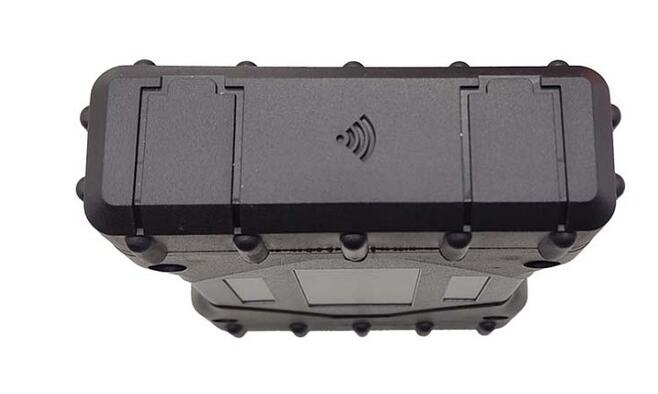 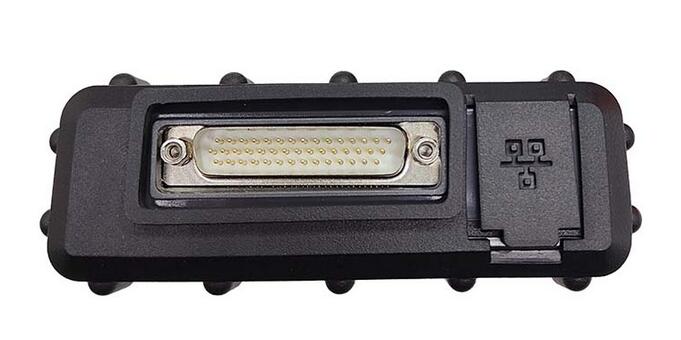
SUPER-MB-STAR-C6-DOIP-WIFI-Diagnostic-Tool-Full-Version-2
SUPER-MB-STAR-C6-DOIP-WIFI-Diagnostic-Tool-Full-Version-3
2.Highlights
1.The new SDconnect C6 is able to work for DoIP.
2.It’s the only C6 that supports ethernet communication (DoIP).
3.Have tested no issues on the new Mercedes with DoIP.
4.No need to worry about firmware damage during the update process
5.The wireless connection is stable. (With built-in Wifi Chip)
6.remote help is available.
7.Good Quality, It’s waterproof, shockproof, and tamper-proof.
8.With Free DTS Monaco & Vediamo
9.Support both 12V Cars and 24V Trucks.
10.not only supports K line diagnosis and CAN BUS, but also UDS diagnose protocol.
11.Connector adopt Military quick swap technology, it can support 10,000 times pull the plug, more stable;
12.All core accessories adopt the original new packing chip, and a 24hours test, guarantee the quality of the products.
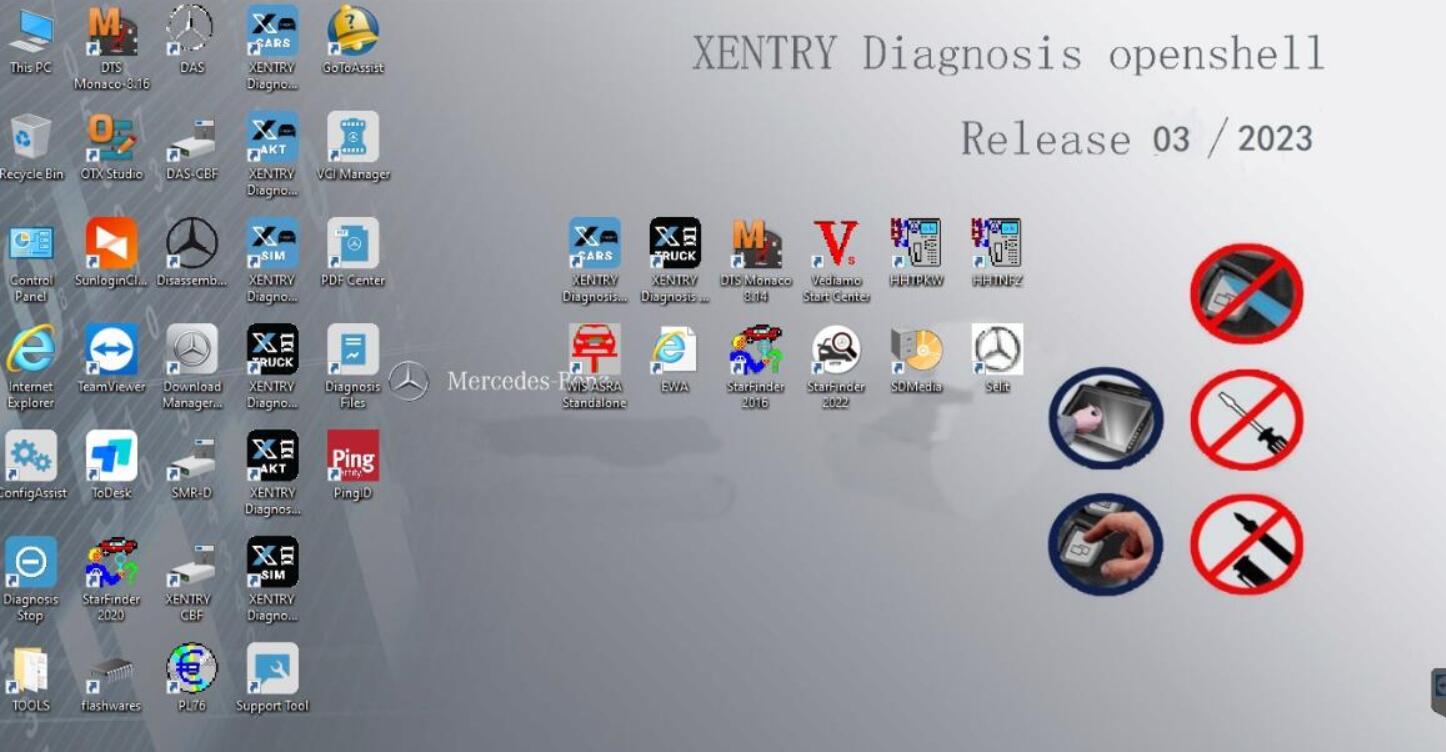
Softwares list:
1. DAS 2023.03: the automatically Diagnosis Assistance System.Support 213/257 and so on new cars to register free to diagnosis
2. Xentry 2023.03: New software released by Bennz Company after 04/2009 by diagnosis new cars.
3.WIS net 2021.07: Workshop Information System
Supply the whole view of the wiring diagram in a car, component location diagram and maintenance method. What you do is to enter the chassis number, and then you will get the manufacture data, engine configuration and the car model -all in detail.
4. EPC.net 2018.11: Electronic Parts Catalog
5. ST Finder: Part Location Finder options: 2016 and 2020 and 2022
6. STARUTILITIES: the movement management system and self-test
7. SD MEDIA 2014
8. PL76 2022.01
9.HHT Software for old cars
10. Engineer version Vediamo updated to V5.01.01, Engineer version DTS updated to V8.16.15,Upgrade to the latest version of 2021 data
1) Fix the error that Mercedes-Benz DAS cannot directly call WIS
2) Join the DAS sedan smart offline programming
3) Join the 204 DAS stand-alone version, which can be mutated (German), which is more powerful than Vediamo
4) Join DAS special function password-free access PKW and SMART
5) Repair SMART 450, 451, 452, 454 No longer need TAN Caculator, all offline
6) Increase offline EOL and VMAX all LKW, modify truck maximum speed limit
7) Lift the truck NOx TORGUE restriction, do not need FDOK XT calculation code, directly enter, directly cancel the legal speed limit, you can modify without special function
8) Clear the truck SCR/ADBLUE fault code (MR), do not need FDOK XN calculation code, enter directly
9)Add DAS 212,207 prototyp model
MB SD Connect C6 Software Functions:
1.1989~up to now Car, Bus, Truck, Sprint, Smart ;
2.All electric system Diagnostic;(Do not include flash code)
3.reading trouble code
4.erasing trouble code
5.live-data
6.adaptation
7.component testing
8.maintenance
9.information consultation
10.component location diagram
11.wiring diagram
Testable systems:
ENGINE
AUTO-SPEED
AIRCONDITIONAL SYSTEM
SRS
ABS
ASR
MPL
GM
Bz ORIGINAL ANTI-THEFT
DASX SYSTEM
KEYZESS GO SYSTEM
OBD-II SYSTEM
MB SD C6 Supported Vehicle List:
Passenger Car Support List:
A(176), A(169), A(168), B(246), B(245), CLC(117), C(204) C(203), C(202), 190(201), E(212), E(211), E(210), 124(124), S(222), S(221), S(220), S(140), S(126), E(207), CLK(209), CLK(208), CLS(218), CLS(219), CL(216), CL(215), CL(140), SLK(172), SLK(171), SLK(170), SL(231), SL(230), SL(129), SL(107), SLS(197), M(166), M(164), M(163), G(463), G(461), E(212), E(211), E(210), 124(124), S(222), S(221), S(220), S(140), CLK(209), CLK(208), CLS(218), CLS(219), CL(216), CL(215), CL(140), SLK(172), SL(231), SL(230), SL(129), SL(107), SLS(197), M(166), M(164), M(163), G(460), GL(164), GLK(204), R(251)
Van Support List:
MB 100(631), T1, SprinterIII, SprinterII, SprinterI, Sprinter900, Citan, Vito(639), Vito(638), V(638), Viano(639), T2, Vario, Vaneo(414)
Truck Support List:
Actros963/4, Actros2,3, AtegoIII, AtegoII, AxorII, Eonic, Zetros, Actros, Atego Light, Atego Heavey, HPN M96, Atron, HPN M2000, SKL, FSK, Further model series
Unimog Support List:
U20, UGN, UHN
Bus Support List:
TRAVEGO, INTOURO, INTEGRO, CITARO, CAPACITY, CITO, TOURISMO, O350/ O403, CONECTO, O404, O405- O408, Minibus, OC500, TOURO, TOURINO, MBC, MULITEGO, O500, O500/ OH, OH, OH368, OF, OF384, LO, O400, FURTHER MODEL SERIES
Super Sports Car Support List:
SLR(199)
:: بازدید از این مطلب : 155
|
امتیاز مطلب : 0
|
تعداد امتیازدهندگان : 0
|
مجموع امتیاز : 0
تاریخ انتشار : سه شنبه 1 فروردين 1397 |
نظرات ()
|
|
نوشته شده توسط : Likaibin
You must read the warnings and instructions which are contained in the safety section of this manual. Before you perform any operation or maintenance procedures ensure you understand the warnings and instructions.
Caterpillar ET 2023A & 2019C Electronic Technician Diagnostic Software
Check Condition
1. Park the machine on level ground. Fully retract the boom and lower the boom.
2. Remove the cover from the rear of the chassis.
3. A limited inspection of the chains can be made through the rear of the boom. The boom extension chain can be inspected by fully extending the boom and looking on top of the intermediate section. If the chains are corroded, the chains must be removed from the boom for cleaning and a full inspection. If the chains require lubricant, the chains must be removed from the boom for cleaning and a full inspection. Refer to the Hydraulic System Systems Operation, Testing and Adjusting, “Boom Chain – Clean/Inspect/Lubricate”or consult your Caterpillar dealer
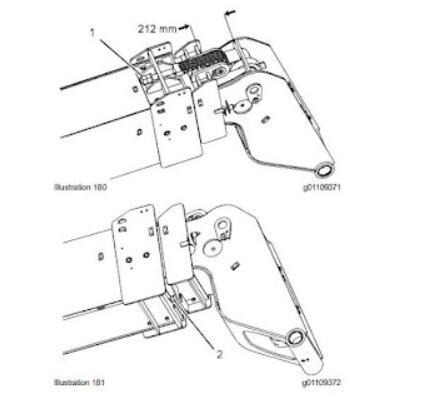
4. Set the minimum distance to 224 mm (8.8 inch) between boom section 2 and boom section 3. The maximum allowable distance is 234 mm (9.2 inch). Tighten extension chain (1) in order to move section 3 outward. Tighten retraction chain (2) in order to move section 3 inward. If the distance is significantly more than 224 mm (8.8 inch), slacken both chains and refer to Step 1.
5. After setting the distance to the required tolerance, tighten the extension chain to 20 N-m (15 lb ft).
6. Tighten the retraction chain to 18 N-m (13 lb ft).
7. Tighten the extension chain to 105 ± 5 Nm (77 ± 4 lb ft).
8. Tighten the retraction chain to 70 ± 5 Nm (52 ± 4 lb ft).
9. Extend the boom and retract the boom several times. Check the torque for the extension chain. Check the torque for the retraction chain.
10. Install the locknut for the extension chain. Torque the locknut for the extension chain to 105 ± 5 Nm (77 ± 4 lb ft).
10.2021 Caterpillar SIS EPC+Service Manual download & Full Installation Service
11. Install the locknut for the retraction chain. Torque the locknut for the retraction chain to 70 ± 5 Nm (52 ±
4 lb ft).
12. Check the shackles on both chains. If necessary, adjust the shackles in order to set the shackles horizontally.
13. Remove the stand and lower the boom.
Best Quality 2023A/2019C CAT Caterpillar ET 3 Diagnostic Adapter III CAT Truck Diagnostic Tool PLUS Panasonic CF19
:: بازدید از این مطلب : 144
|
امتیاز مطلب : 0
|
تعداد امتیازدهندگان : 0
|
مجموع امتیاز : 0
تاریخ انتشار : سه شنبه 1 فروردين 1397 |
نظرات ()
|
|
نوشته شده توسط : Likaibin
This instruction show you guide on how to use Launch X431 IMMO to add a new key for Porsche Cayenne 2011-2017. For more repair case about Porsche,please refer to:Porsche Cayenne Repair Cases.
Device Requires:
LAUNCH X431 IMMO
Procedures:
Select “Porsche”à”Anti-Theft Key Matching”à”CAYENNE”à”2011-2017”
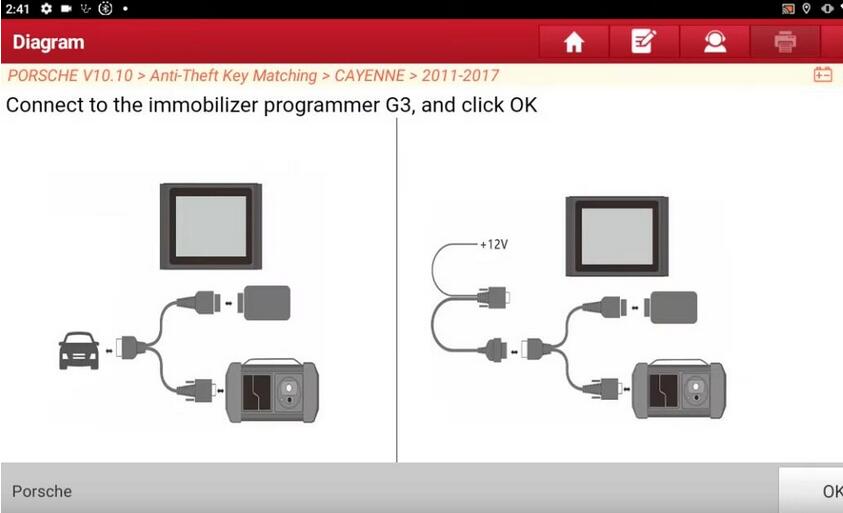
Please follow the picture to build connection:connect to the immobilizer programmer G3,and click “OK”
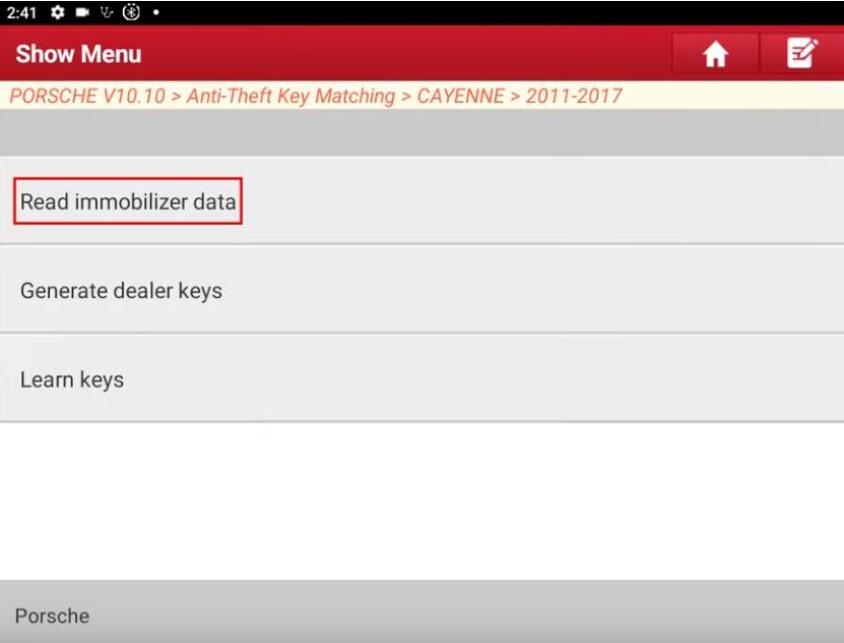
Click “Read immobilizer data”
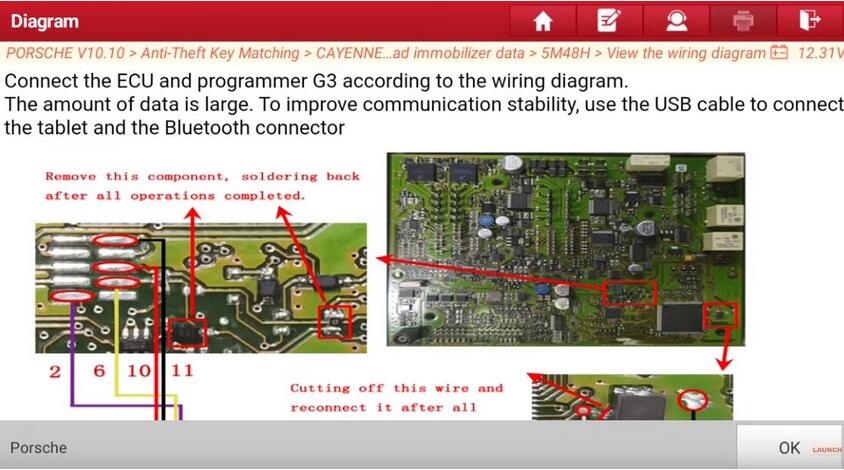
Select “5M48H”à”View the wiring diagram”
Connect the ECU and G3 programmer according to the wiring diagram.The amount of data is large.
To improve communication stability,use the USB cable to connect the tablet and the Bluetooth connector.
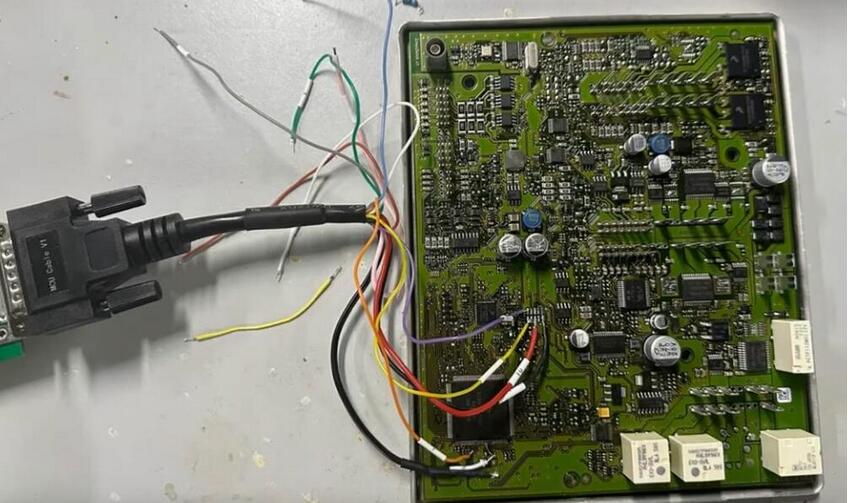
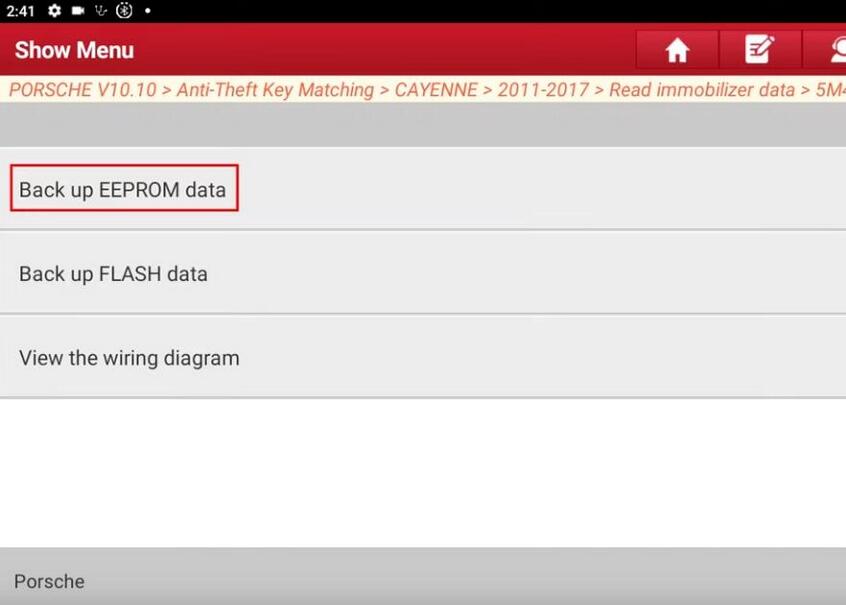
Click “Back up EEPROM data”
Input file name to store in on your X431 device (here file name eep)
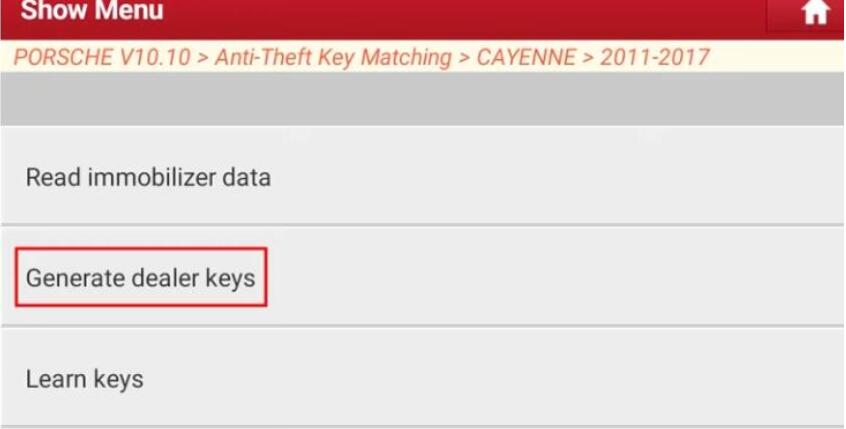
Now back to menu to select “Generate dealer keys”
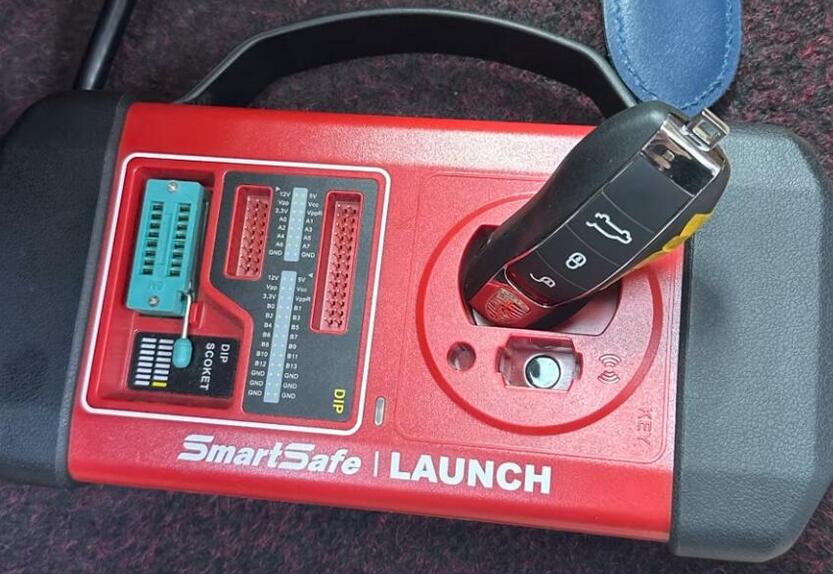
Place new key you want to add to G3 programmer slot
Select the EEPROM data file you read before (name eep)
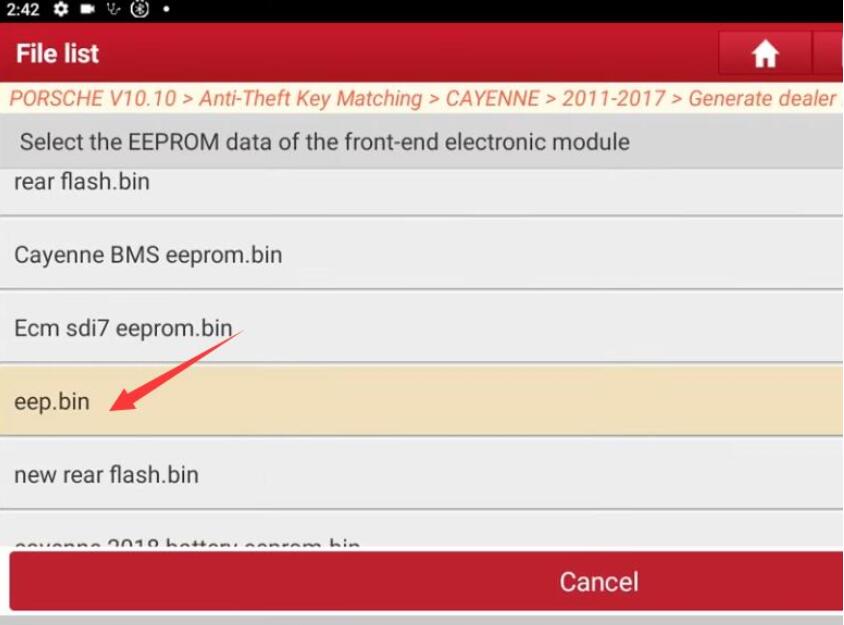
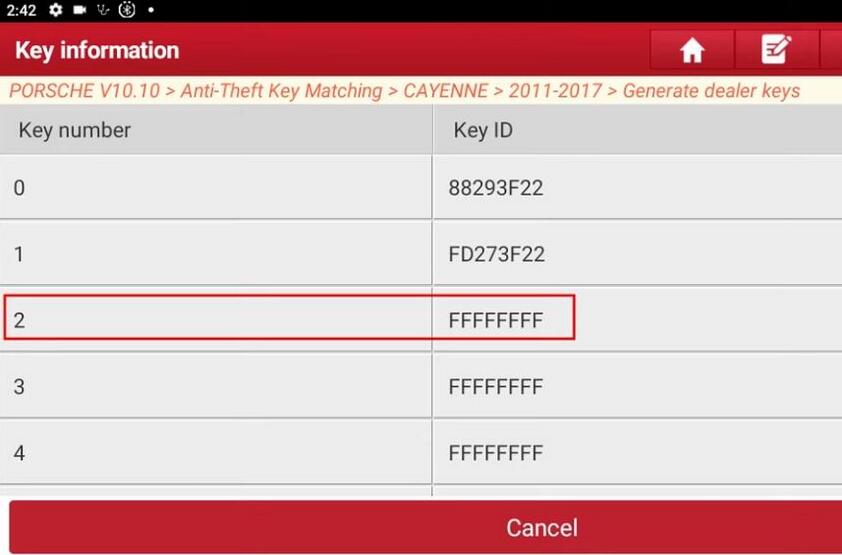
Select unused location to generate new key
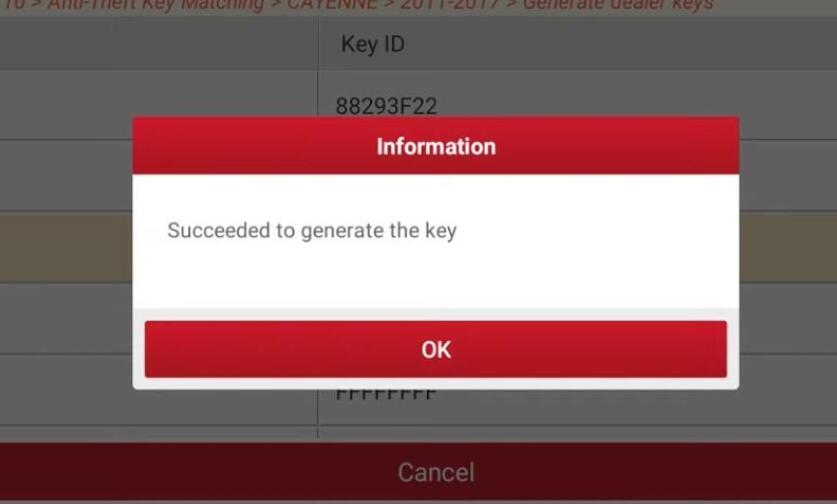
Generate new key successfully
Now back to select “Learn Keys”
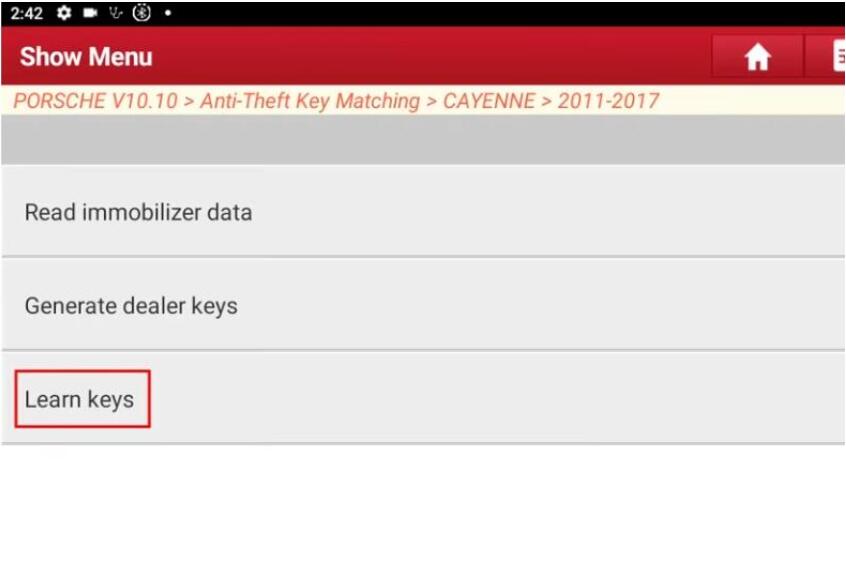
Now here you need re-match all key
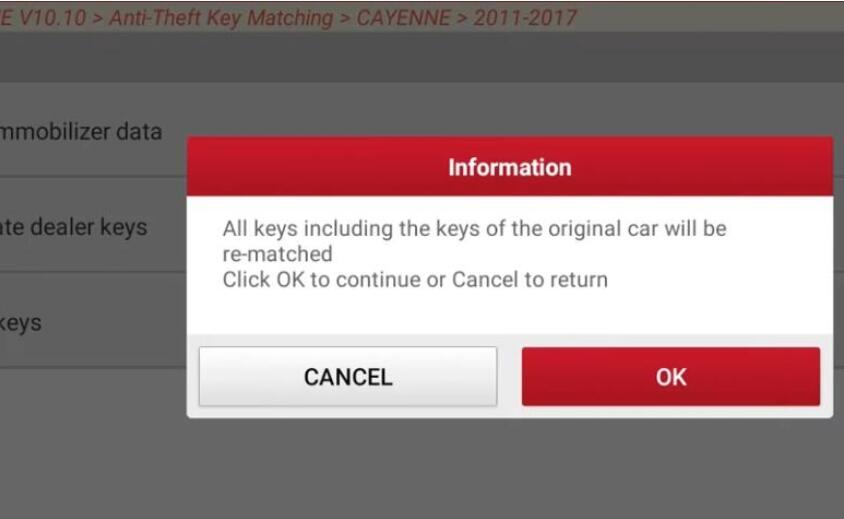
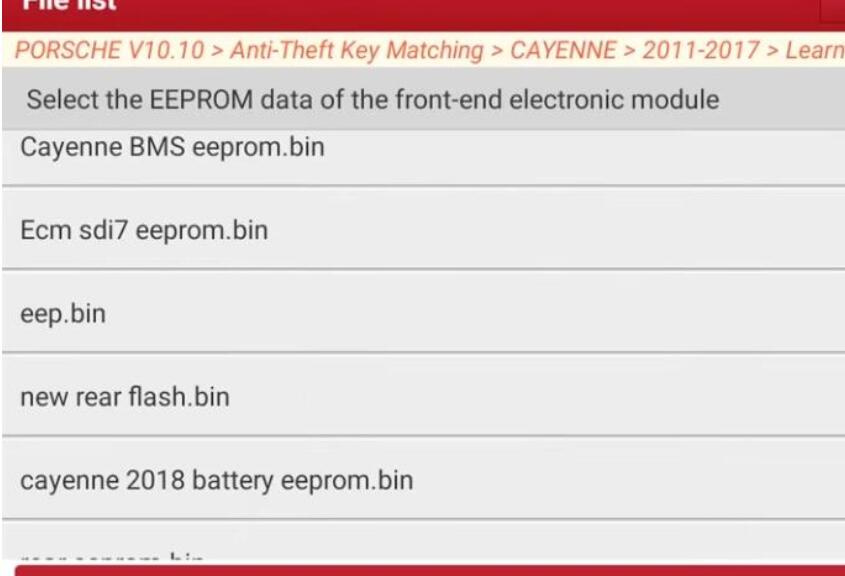
Here select the eep file read before again
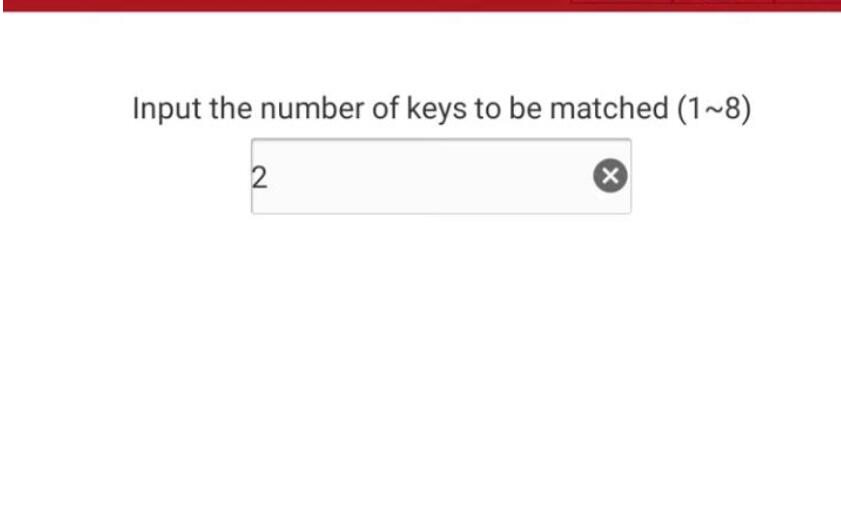
Input the number of keys to be match:2
Insert new key and switch to ON
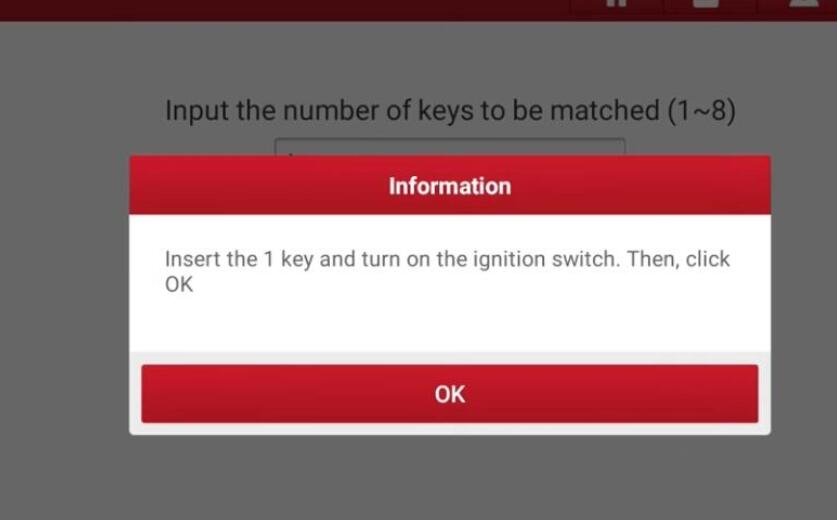
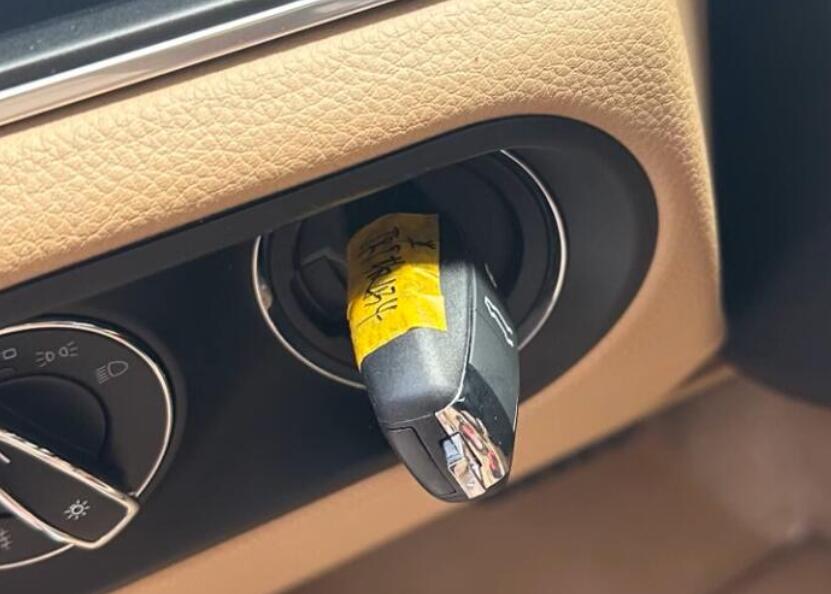
Then it will ask you to match second PC,just do same steps
After then matching completed.
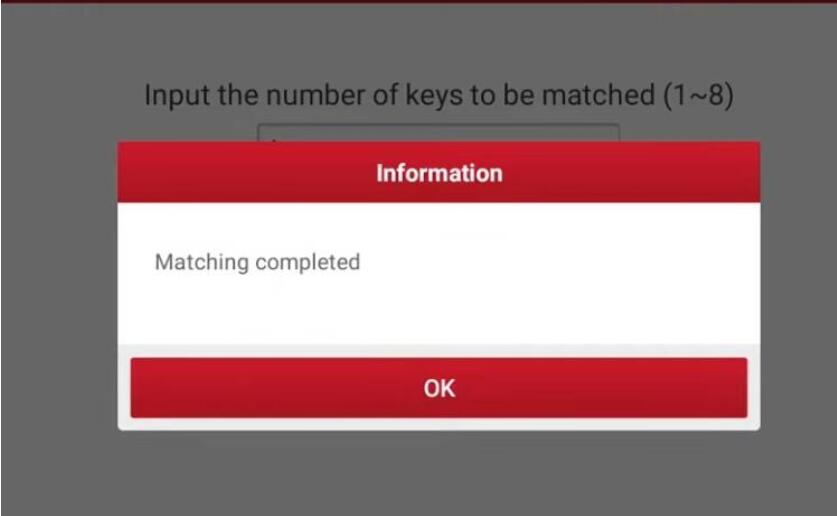
More test report about Launch X431 please check:Launch X431 Test Report
:: برچسبها:
Launch X431 ,
:: بازدید از این مطلب : 137
|
امتیاز مطلب : 0
|
تعداد امتیازدهندگان : 0
|
مجموع امتیاز : 0
تاریخ انتشار : سه شنبه 1 فروردين 1397 |
نظرات ()
|
|
نوشته شده توسط : Likaibin
This post is about Lonsdor K518ISE Key Programmer Appearance introduction includes Main unit appearance and KPROG Adapter appearance by CnAutotool.
The K518ise main unit appearance:
Front View:

1. Trademark: Lonsdor
2. Three-color indicator in turn will be: red – external power supply; blue – system power;
yellow – communication status
3. Capacitive touch screen: display and touch operation function.
4. Switch: press and hold for 3s to start. When in start state, press and hold for 3s to restart
or shutdown, for 10s to force to restart.
5. Volume: adjust volume size
6. Key frequency & chip recognition system: place the key on the surface to detect
frequency, push the slot shell to the right and put the key inside to detect chip
7. Setting: enter to set
8. Home: home page interface
9. Return: back to previous step
10. Built-in antenna: antenna inside
11. Model: Auto key Programmer K518ISE
Top View:

1. Power socket
2. SD card slot
3. DB25 port
4. USB port
The KPROG Adapter Appearance:
Front View:

1. Trademarks
2. Three-color indicator: red – power light;
blue – data light; yellow – comm status light
3. Simple horn seat: to connect with 20P cable
Up View:

1. Power socket
2. DB15 port
USB port. 3
http://autotool.bloguez.com/autotool/6096988/Lonsdor-K518ise-review-by-Turkey-locksmith
:: برچسبها:
Lonsdor K518ISE Key Programmer,Lonsdor K518ISE,K518ISE Key Programmer,K518ISE,Key Programming Devicecar key programmer, ,
:: بازدید از این مطلب : 223
|
امتیاز مطلب : 0
|
تعداد امتیازدهندگان : 0
|
مجموع امتیاز : 0
تاریخ انتشار : یک شنبه 20 اسفند 1396 |
نظرات ()
|
|
|
|
|


